
Guides
How to Use Interfacing: A Complete Guide
You've probably had this happen. You finish a shirt, press it beautifully, stand back to admire it, and the collar looks limp. Or you make a tote that seemed sturdy at the cutting table, only for it to collapse the moment you put anything inside.
That's usually the point where sewists realise interfacing isn't an optional extra tucked away in the pattern envelope. It's part of the engineering. If fabric is the visible surface, interfacing is the hidden support that helps a garment or accessory keep its shape, behave properly, and survive wear.
Learning how to use interfacing changes the look of your sewing fast. Button plackets sit flatter, facings stop rolling out, cuffs feel crisp rather than floppy, and waistbands hold their line instead of crumpling by lunchtime. The trick isn't just adding interfacing. It's choosing the right one, cutting it properly, and applying it without distortion.
The Secret to a Professional Finish
A lovely lawn blouse with a soft, drooping collar. A handmade jacket with facings that won't stay inside. A bag with a base that caves in. These are all classic signs that the outer fabric needed support, but either got the wrong kind or missed it altogether.
Interfacing gives fabric structure, stability, and control. Sometimes that means crispness, such as a shirt collar or button stand. Sometimes it means reinforcement, such as a neckline facing that shouldn't stretch out while you sew. Sometimes it helps fabric behave, especially where a garment gets strain from buttons, zips, or repeated pressing.
Think about a waistband on linen trousers. Without interfacing, it can rumple and twist after a few wears. Add the right support and the same waistband looks cleaner, wears better, and feels more intentional. The same goes for cuffs, lapels, pocket flaps, bag straps, hats, and even hems in certain projects.
Practical rule: If an area needs to hold a shape rather than collapse into the body of the garment, it probably needs interfacing.
What catches beginners out is that interfacing isn't one thing. It comes in different fibres, different weights, different constructions, and two main application methods. A soft drapey viscose blouse doesn't want the same support as a denim overshirt. Stretch jersey doesn't want the same treatment as a woven cotton collar.
That's where the professional finish comes from. Not from using more interfacing, but from using the one that supports the fabric without fighting it. Good interfacing should feel like part of the fabric once it's applied. If you can feel it as a separate layer, or the project suddenly turns cardboard-stiff, something has gone off course.
Choosing the Right Interfacing for Your Project
A poor interfacing choice can spoil good sewing faster than a crooked seam. The collar looks sharp on the ironing board, then turns stiff and clumsy once it's on the garment. Or the opposite happens. You make a neat waistband, wear it twice, and it starts to collapse.
The fix is simpler than the shop wall makes it seem. Choose interfacing by asking three practical questions. How will it be attached. How should it behave. How much support does this fabric need.
Fusible or sew-in
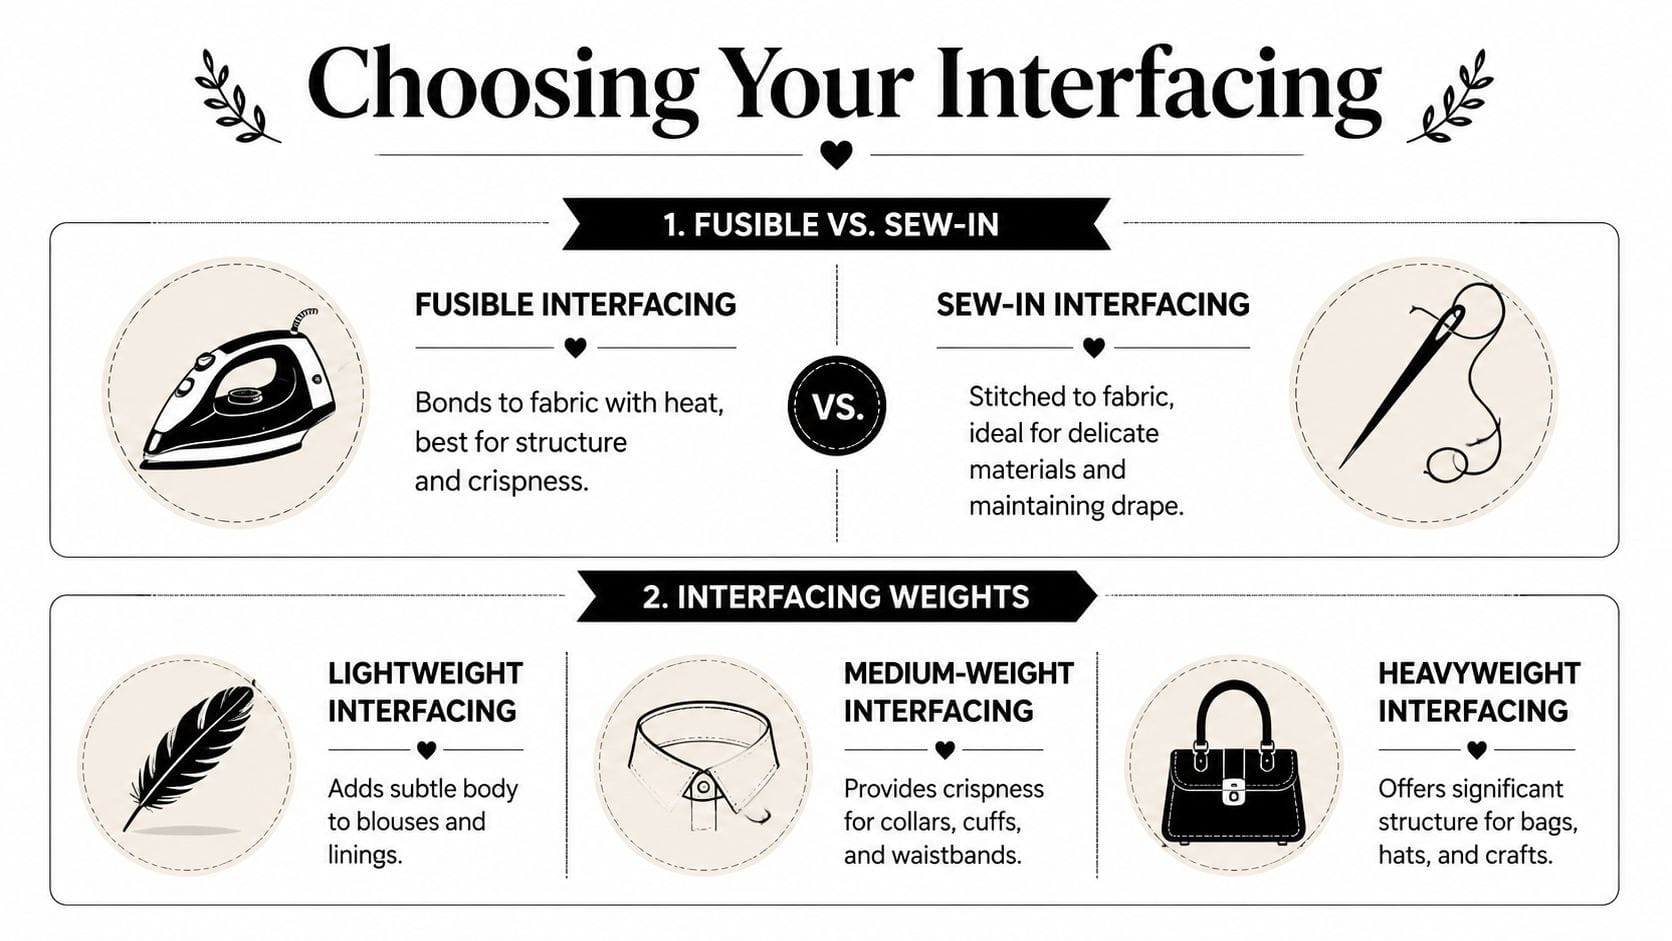
Fusible interfacing bonds to the fabric with heat. It suits plenty of everyday dressmaking jobs, including collars, cuffs, waistbands, facings, plackets, and bag pieces. It saves time, keeps layers from shifting, and gives a cleaner result when you want control.
Sew-in interfacing is stitched in place. It earns its place with fabrics that dislike heat or adhesive, and with projects where softness matters more than speed. Velvet, boucle, some silks, and open-weave fabrics often look better with sew-in because the surface stays fuller and the fabric keeps its character.
Neither option is better in every case. Fusible is faster and often tidier for beginners. Sew-in gives you more control over drape, and it avoids the bubbling and show-through that can happen on delicate fabrics.
Here's the practical comparison I use at the cutting table:
| Type | Best For | Application | Pro Tip |
|---|---|---|---|
| Fusible | Collars, cuffs, waistbands, facings, bag parts | Pressed onto fabric with heat | Test on a scrap first to check drape, texture, and heat tolerance |
| Sew-in | Delicate, textured, heat-sensitive, or softly structured fabrics | Basted or stitched to the fabric | Trim seam allowances on the interfacing where bulk would spoil the edge |
| Woven | Areas where grain matters, stable garment sections, dressmaking details | Fusible or sew-in depending on product | Match the grainline to the fabric so it moves naturally |
| Non-woven | Crafts, simple stabilising, many bags and utility projects | Often fusible, sometimes sew-in | Handy and inexpensive, but less convincing in fine garments |
| Knit | Stretch garments, jersey necklines, knit cuffs and bands | Usually fusible | Match the direction of stretch to the garment fabric |
Woven, non-woven, or knit
Woven interfacing behaves most like woven fabric. It has grain, and that matters. If the garment fabric has a clear lengthwise and crosswise direction, woven interfacing usually gives the most natural support. It is often the best choice for collars, lapels, front facings, and any area where you want shape without a papery feel.
Non-woven interfacing is made from bonded fibres rather than threads. It is easy to cut and widely available, which is why many beginners start there. It works well in crafts, bags, and utility sewing. In dressmaking, the trade-off is feel. On lighter fabrics especially, it can make one section feel separate from the rest of the garment.
Knit interfacing has stretch. Use it on jersey, ponte, sweatshirt fleece, and other fabrics with give. A stable interfacing on a stretchy area can create ripples, drag lines, or a neckline that no longer recovers properly after wear.
The best interfacing supports the fabric's behaviour. It should not fight it.
Weight matters more than brand
Beginners often focus on the packet name and ignore the weight. Weight is what you feel in the finished garment.
As a working rule, choose an interfacing that is slightly lighter than the main fabric, or close to it if you need firm support. Go too heavy and the garment starts to feel forced. Go too light and the area still sags, stretches, or loses shape after pressing and wear.
A few common pairings make the point clearer:
- Lightweight interfacing suits blouse facings, fine cottons, lawn, viscose mixes, and light linings.
- Medium-weight interfacing works for shirt collars, cuffs, button stands, skirt waistbands, and many dress facings.
- Heavyweight interfacing is more at home in bags, hats, storage projects, and firm craft work than in most garments.
I also check the fabric after fusing a sample by folding it over my hand. If it bends like the original fabric, only a little firmer, it is usually in the right range. If it juts out or holds a hard ridge, it is too much.
Sustainable options that make sense
Lower-impact choices are easier to find now, and they are worth considering as part of your normal decision, not as a separate special category. If you like woven interfacing for garments, look for versions made with cotton or other natural fibres rather than defaulting straight to synthetic non-wovens. If you prefer sew-in methods, that can also reduce reliance on adhesive products for areas that do not need them.
The trade-off is practical rather than moral. Some sustainable options cost more, some shrink if they are not prepared properly, and some behave differently under steam. They still need testing, just like any other interfacing.
That said, they can give beautiful results. A good cotton woven sew-in or fusible often feels more fabric-like in a garment, especially on natural fibres. For dressmakers who want cleaner finishes and more thoughtful material choices, that is well worth knowing early.
Essential Preparation for Flawless Results
A collar can be cut beautifully and stitched neatly, then still look homemade because the prep was rushed. Interfacing is usually blamed, but the actual problem often starts earlier, at the cutting table and ironing board.
Start with a proper test
Use scraps first. Always.
Cut a small piece of your fabric and a matching piece of interfacing, then test them the way the finished garment will be handled. Fuse or baste the sample, fold it, scrunch it lightly, let it cool, and press it again. That quick trial tells you more than the packet ever will.
You are checking three things. Does the fabric still drape naturally? Does the interfacing bond cleanly without bubbling or ridging? Does the area feel supported rather than stiff? If the sample turns papery, go lighter. If it changes almost nothing, go firmer. If it bubbles, the issue is usually heat, moisture, pressure, or poor preparation rather than the fabric being “difficult”.
Cut with intention
Accuracy matters here in a quiet way. A collar or facing can be only slightly off grain and still behave badly once worn.
For woven interfacing, match the grainline to the fabric grain. For knit interfacing, line up the stretch so the fabric and interfacing move together rather than fighting each other. This is one of those small dressmaking habits that gives a cleaner finish without adding much time.
With sew-in interfacing, I often do not include the seam allowance at all on collars, cuffs, waistbands, and facings. Trimming it away before sewing reduces bulk at the seam line and helps the edge roll properly to the underside. Beginners often try to press a thick edge flatter, but bulk is a cutting problem as much as a pressing problem.
A bulky seam rarely improves with more steam. It usually improves with less fabric in the seam allowance.
This also opens up a useful trade-off. Leaving seam allowances on can add support in some structured areas, especially heavier fabrics or projects that need a very firm edge. Trimming them away gives a softer, cleaner result in lighter garments. The best choice depends on the fabric, not just the pattern instructions.
Prepare the fabric before you apply anything
If the finished garment will be washed, pre-wash the main fabric first. Interfaced sections can pull and distort after the first wash if the outer fabric shrinks later.
Press the fabric flat before you start. Creases, folds, and puckers can be fused in permanently, and once that happens the piece rarely looks quite right. If the adhesive side of the interfacing is hard to spot, mark it with a pin or a small chalk mark straight away. It saves second-guessing once the iron is hot.
Sustainable options need prep too. Cotton and other natural-fibre interfacings can give a lovely, fabric-like result, but some shrink more than synthetic versions and some react differently to steam. Test them exactly as you would any other interfacing. Better material choices still need good handling.
A short prep checklist
- Pre-wash the main fabric if the garment will be washed later.
- Test the interfacing on scraps before cutting into your proper pieces.
- Check grain or stretch direction before cutting the interfacing.
- Decide whether to trim off seam allowances on sew-in pieces before cutting everything out.
- Press the fabric smooth first so creases do not get fixed into place.
- Mark the adhesive side early if it is not obvious.
Applying Fusible Interfacing Like a Pro
You cut a collar neatly, fuse it, and it still comes out with bubbles or a slight twist. That usually comes down to technique, not bad luck.
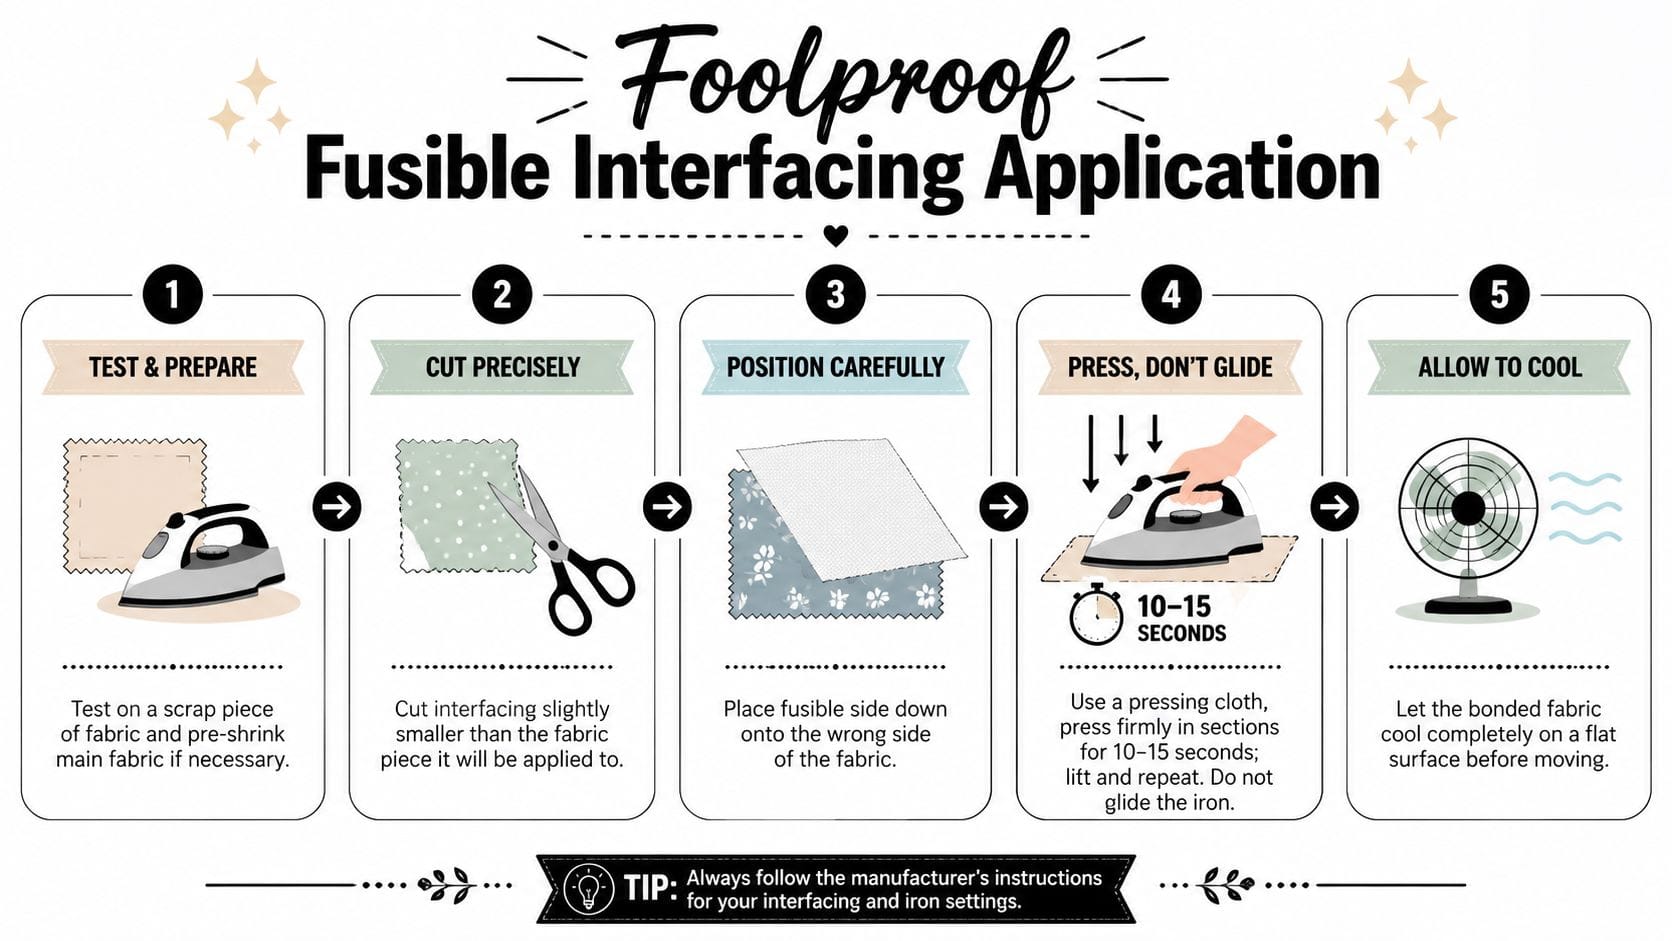
Fusible interfacing needs pressing, not ironing. If the iron slides, the fabric can stretch off grain, the interfacing can creep, and the finished piece often looks just a little homemade even when the stitching is good.
The method is simple. Press, hold, lift, move.
Identify the adhesive side correctly
Check the interfacing before the iron goes anywhere near it. The fusible side is often slightly shiny, dotted, or rougher to the touch. That side sits against the wrong side of the fabric.
Lay the fabric wrong-side up on the board and place the interfacing adhesive-side down. If it goes on the wrong way round, the glue can stick to your press cloth or iron, and cleaning that up is a nuisance you do not need.
If the adhesive side is hard to spot on a very lightweight interfacing, I fold back one corner before I start. It is a small habit, but it saves hesitation once the piece is warm and you are trying to work quickly.
Use heat, moisture, and time together
Good fusing comes from the right combination of heat, a bit of moisture, and enough time for the glue to melt and grab. A dry, rushed press is one of the main reasons corners lift later.
Cover the piece with a damp press cloth, then lower the iron straight down and hold it still. Lightweight fabrics need a gentler touch and shorter holds. Heavier fabrics or denser interfacings usually need longer in each spot. The scrap test you prepared earlier is what tells you where that balance sits.
Then lift the iron and place it in the next area. Do not slide it across the surface.
Once the whole piece is fused, leave it flat until it is fully cool. Warm adhesive is still soft. If you pick the piece up too soon, you can stretch an edge or create tiny bubbles that only show once the fabric is sewn into the garment.
Here is the order that gives reliable results:
- Lay the fabric flat with the wrong side facing up.
- Position the interfacing with the adhesive against the fabric.
- Cover with a damp press cloth.
- Press and hold in one area without moving the iron.
- Lift and reposition until the full piece is bonded.
- Check a corner once the piece has started to cool.
- Leave it flat until completely cold before handling.
If the bond looks patchy while the piece is still warm, wait. Fusible often settles as it cools, and judging it too early leads people to over-press.
A visual walkthrough can help if you prefer to see the motion rather than read it:
Small choices that change the finish
A press cloth protects more than the iron. It softens the direct heat, helps prevent shine on delicate fabrics, and gives the adhesive a better chance to melt evenly. For cottons and linens, I usually use a damp cotton cloth. For fabrics that mark easily, a finer cloth helps you keep more control.
Trimming seam allowances can also make a visible difference. On bulky collars, cuffs, and waistband pieces, trimming the fusible out of the seam allowance before application reduces ridge lines and helps the seam turn more cleanly. On very unstable or loosely woven fabric, I sometimes keep the interfacing full size because that extra hold at the edge prevents fraying and distortion. This is one of those trade-offs that pattern instructions often skip.
Sustainable fusibles are worth trying too. Woven cotton or recycled-fibre options can give a more natural handle than some synthetic products, but they are not as forgiving if your pressing is uneven. Test them properly. The greener choice still has to suit the fabric and the job.
What usually works, and what usually causes trouble
Works well
- Using a damp press cloth: Helps the glue bond evenly and protects the fabric surface.
- Pressing in sections: Keeps the shape accurate.
- Letting the piece cool flat: Reduces bubbling and warping.
- Matching the interfacing to the fabric weight: Keeps the garment support in proportion.
Usually causes trouble
- Sliding the iron: Pulls the layers out of place.
- Too much heat on delicate cloth: Can create shine, stiffness, or adhesive bleed.
- Handling the piece while warm: Weakens the bond and can distort the edge.
- Using a fusible that is too heavy: Makes soft garments feel cardboard-like.
A few real examples
A cotton poplin collar usually handles a medium fusible well, especially if you trim the seam allowances on the interfacing so the collar points turn sharply. A viscose facing often needs something lighter, or the neckline can look strangely rigid against an otherwise fluid garment. For bag panels, a firm fusible can be exactly right, but only if the outer fabric has enough body to support it without wrinkling around the fused area.
The process stays much the same from project to project. The professional finish comes from judging the fabric in front of you, pressing with patience, and knowing where a small adjustment will save you trouble later.
Mastering Sew-In Interfacing Techniques
Sew-in interfacing has a reputation for being old-fashioned or fussy. It isn't. It's better suited to fabrics that don't respond well to glue and heat, or projects where you want support without the crisp finish that fusible often brings.
If you've ever pressed velvet and watched the pile suffer, or fused silk and felt it lose some of its character, you'll understand why sew-in still earns its place.
When sew-in is the better choice
Sew-in interfacing shines in a few common situations:
- Delicate fabrics such as silk or very fine dress fabrics that can mark easily.
- Textured fabrics such as velvet, boucle, or fabrics with surface interest that heat can flatten.
- Soft tailoring where you want shape, but still want the garment to move fluidly.
- Projects needing careful edge control where trimming and layering matter more than adhesive speed.
It also gives you more control while sewing. You can baste, check the shape, and adjust before committing the final seams.
Two ways to attach it
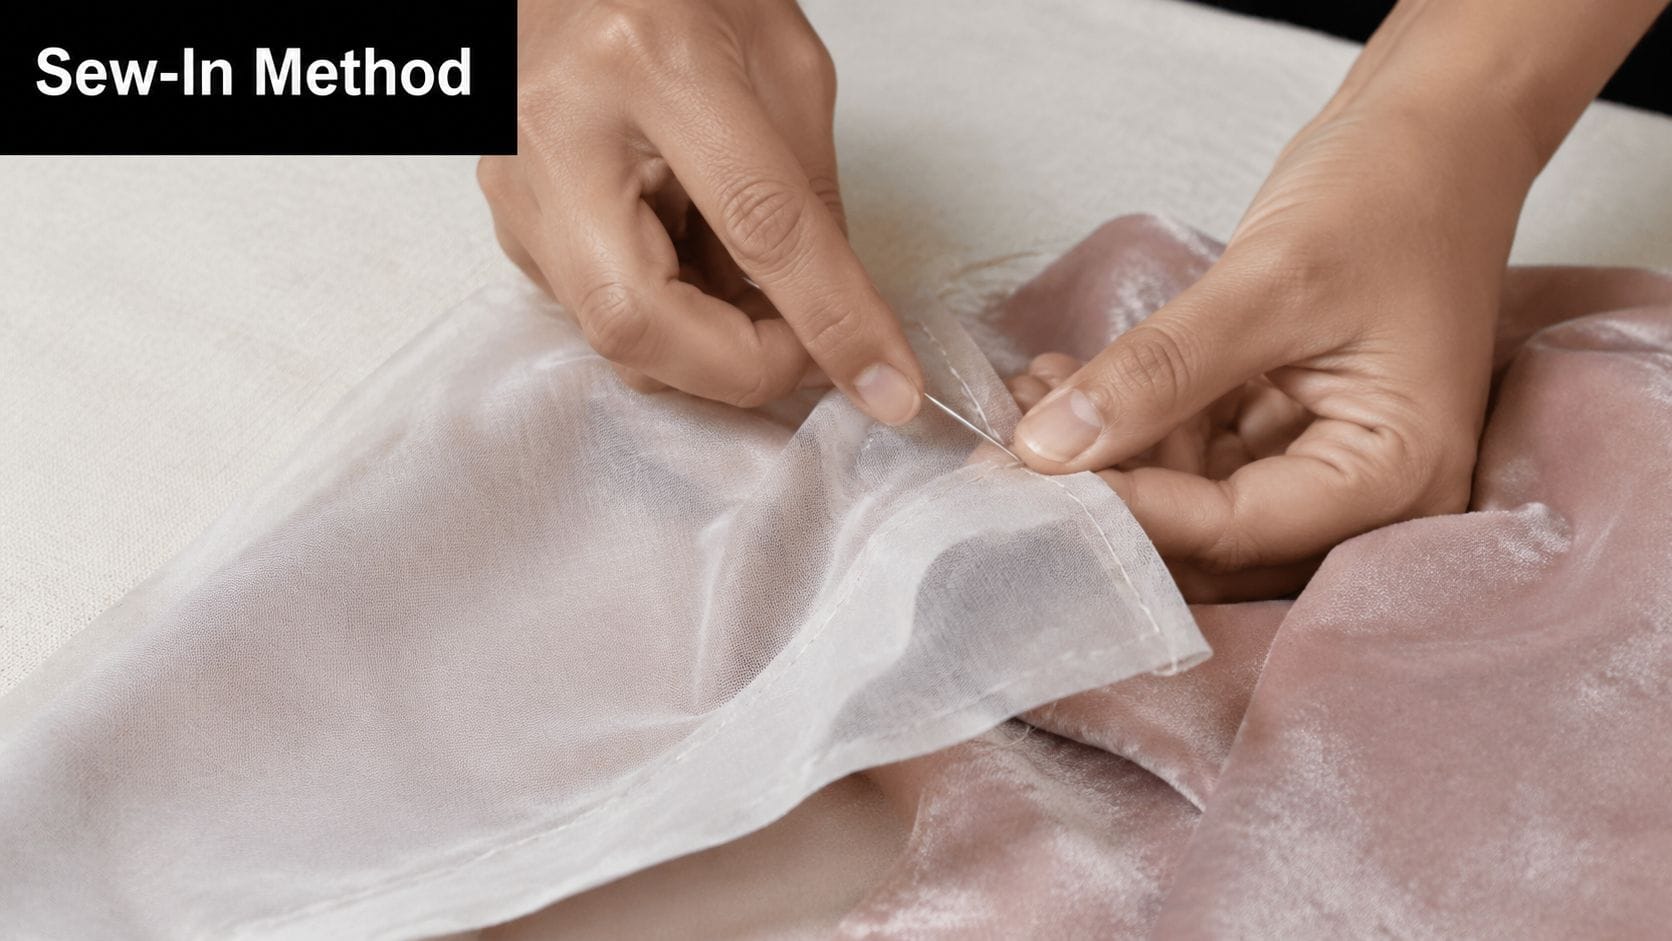
The first method is hand-basting within the seam allowance. This is excellent for collars, facings, lapels, and any piece where you want the interfacing held in place while still treating the fashion fabric gently. Long running stitches are enough. They don't need to be pretty. They just need to stop the layers shifting.
The second method is machine-stitching the interfacing to the fabric as though they are one layer. This works well for straightforward pieces like waistbands, plackets, or bag sections where the fabric is stable and the shape is simple.
The choice depends on the project. If precision matters and the fabric is delicate, hand-basting gives more control. If the piece is utilitarian and stable, machine handling is quicker.
Sew-in interfacing rewards patience at the cutting and basting stage. That's where the clean edge comes from.
Trimming for a flatter edge
This is the trade secret many beginners don't get told soon enough. Trim the seam allowance off the sew-in interfacing, or trim it back close to the stitch line where appropriate. That lets the seam itself stay manageable and helps collars, cuffs, and facings turn and press cleanly.
A shirt collar is a good example. If both fabric layers and the interfacing all run into the seam at full width, the edge gets bulky. The collar can look puffy rather than sharp. Trim the interfacing back and suddenly the seam rolls neatly, the points turn more cleanly, and pressing becomes much easier.
For a waistband, you may keep the interfacing out of one seam allowance but leave it in another depending on how the waistband is enclosed. For a cuff, trimming the interfacing before assembly often gives a much nicer edge than trying to hammer bulk away with steam later.
Good habits with sew-in
- Baste before final construction when working on slippery or delicate cloth.
- Use sharp shears so trimmed edges stay neat.
- Press with care after sewing to shape the piece, not flatten it harshly.
- Grade seam allowances when multiple layers meet, especially in structured work.
Sew-in interfacing takes longer, but it gives beautiful control. For some fabrics, it's not the second-best choice. It's the right one.
Troubleshooting and Project Specific Tips
Even careful sewists get the occasional bubble, stiff placket, or collar that looks slightly overstuffed. The useful question isn't “why did this go wrong?” in the abstract. It's “what usually causes this exact problem?”
If the interfacing looks bubbly or wrinkled, the culprit is often poor adhesion, too much movement during pressing, or handling the piece before it cooled. Sometimes you can rescue it by reapplying with a damp press cloth and proper stationary pressure. Sometimes the adhesive never bonded evenly in the first place, and replacing the piece is faster than fighting it.
If a garment area feels too stiff, the interfacing is usually too heavy for the fabric. A soft viscose facing paired with a firm non-woven often gives that tell-tale cardboard effect. Next time, sample a lighter woven or knit option that supports without overpowering.
A few project-specific wins make life easier:
- For bags: A firm non-woven or heavier interfacing can give shape where collapse would be annoying, especially in straps, bases, and outer panels.
- For waistbands: Use enough support to stop wrinkling, but think about seam bulk. A neatly chosen medium support usually wears better than the heaviest option.
- For stretch fabrics: Use knit interfacing. A stable interfacing on jersey can create drag lines, rippling, or a neckline that no longer stretches enough to wear comfortably.
- For collars and cuffs: Clean edges come from trimming and grading as much as from the interfacing itself.
Care matters too. Interfaced garments keep their shape better when they're pressed thoughtfully rather than scorched into submission. Let steam do the work. Use a press cloth when needed. Store structured garments on hangers that support the shoulder line, and don't crush collars and lapels under piles of laundry.
Good interfacing shouldn't announce itself. It should make the finished project look calmer, sharper, and more intentional.
If you're ready to put these techniques into practice, More Sewing is a brilliant place to find quality fabrics, haberdashery, dressmaking kits, and the practical supplies that make sewing smoother from the start. Whether you're choosing interfacing for a first blouse or sourcing materials for a more custom project, it's well worth a look.
