
Guides
Perfect Printing Sewing Patterns: Your 2026 How-To
You've downloaded a PDF pattern, opened the file, and felt that little wobble of uncertainty. The sewing part is familiar. The printing part isn't always. One wrong setting and a bodice ends up too snug, a sleeve cap won't fit, or a trouser leg comes out just enough off-grain to make you question the whole project.
That's why printing sewing patterns deserves the same care you'd give cutting expensive fabric. The good news is that once you understand the decisions at the start, the rest becomes routine. You're really choosing between two paths. Print at home on A4 and assemble the tiled pages yourself, or send the copy shop file to a large-format printer and work from full-size sheets.
Both methods work. I use both, depending on the pattern, the deadline, and frankly my patience level that day. For a quick top I want to start tonight, A4 is often fine. For trousers, coats, or anything with many pieces, A0 usually saves me time and preserves my temper.
Your Guide to Flawless PDF Pattern Printing
You sit down ready to sew, open the pattern folder, and find five files with near-identical names. A4. US Letter. A0. Layers. Projector. That is the point where many sewists lose momentum, not because the pattern is difficult, but because the print choice feels less familiar than the sewing.
The first job is to identify which file matches the way you want to work. Most PDF patterns give you two realistic print routes. A4 tiled pages are for home printers and need trimming and taping. A0 copy shop files are printed full size on large sheets, which cuts out most of the prep at your table.
Choose the method that suits the project, your timetable, and your tolerance for pattern assembly. I print both ways in my own work. If I want to start a blouse after dinner, A4 usually gets me going fastest. If I am cutting trousers, a coat, or anything with long pattern pieces, I send the A0 file to print and save myself the joining-up.
Choose based on the job in front of you
Home printing gives you control. You can print tonight, reprint a damaged page tomorrow, and often print only the size layers you need if the file allows it. In the UK, that also means working with the paper size most home printers are already set up for. A4 is straightforward once the settings are right, but the trade-off is time. Trimming and taping a 60-page pattern is real work, and accuracy slips if you rush it.
Copy shop printing reduces that handling. One large sheet is easier to check, easier to trace from, and usually easier to store flat before cutting. It does cost more, and it asks for a bit more planning. You need the correct A0 or copy shop file, and UK copy shops vary. Some understand sewing patterns immediately. Others are geared more toward architectural drawings and need clear instructions not to scale the file, crop margins, or add fit-to-page settings.
A simple rule works well:
Match the print method to the amount of assembly you are willing to do before you sew.
A few common examples make the choice clearer:
- Children's clothes, camisoles, simple tops, and small accessory patterns are usually good candidates for A4. The page count stays manageable, and printing at home can be quicker than placing an order.
- Trousers, coats, voluminous dresses, and multi-view jackets are often worth printing on A0. Large pieces are less forgiving of taping errors, especially on long inseams, fronts, and facings.
- Layered patterns with many size options suit either method, but they are easier to use if you switch off the sizes you do not need before printing.
Getting this decision right saves more than paper. It protects fit, reduces wasted fabric, and makes the rest of the process feel calm instead of fussy. Once you know why you are choosing A4 or A0, every step after that becomes easier to judge with confidence.
The Critical First Step Your Test Square
You print the file, tape a few pages together, and everything looks fine. Then the bodice comes out tight or the trouser leg twists. In my experience, that problem often starts with one small box that was never measured properly.
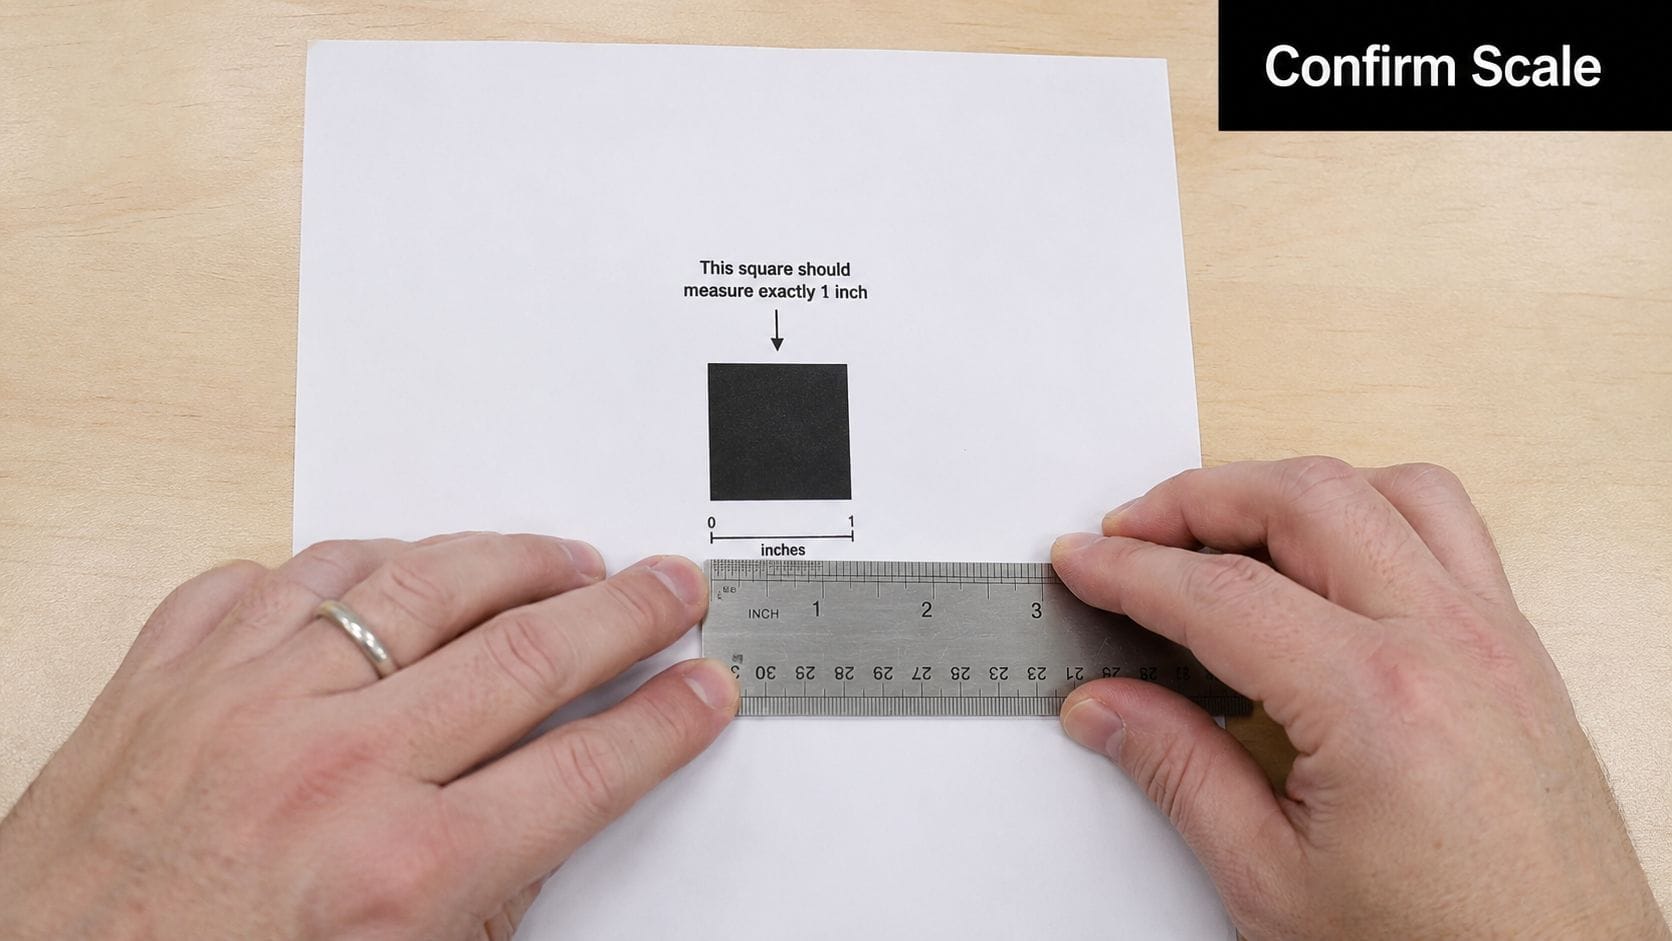
Before you print the full pattern, print the page with the test square and check it with care. Open the PDF in Adobe Acrobat Reader, not a browser print window and not Mac Preview. Set the print option to ACTUAL SIZE or CUSTOM SCALE 100%, then print that single page first, as shown in The Fold Line's PDF pattern tutorial.
Why this tiny box matters so much
The test square is a scale check. On many sewing PDFs it measures 10cm x 10cm, which makes it especially useful for UK sewists working in metric. If that square is even slightly off, every pattern piece is off with it.
A pattern can still look neat on the page while printing at the wrong size. That is the trap. The margins look tidy, the pages line up, and the error only shows up later when seam lines refuse to match or the finished garment comes out smaller than expected.
I treat the square as a yes-or-no checkpoint. If it measures correctly in both directions, I keep going. If it does not, I stop and fix the print settings before I waste paper or, worse, fabric.
The quickest way to check it properly
Use this order every time:
- Open the PDF in Adobe Reader. It gives you the most reliable control over scale.
- Choose Actual Size or Custom Scale 100%. Avoid settings such as “fit”, “shrink oversized pages”, or “scale to printable area”.
- Print only the page with the test square. One sheet is enough to confirm the setup.
- Measure with a proper ruler. A metal ruler is best because it sits flat and the markings stay accurate.
- Measure width and height. Both need to be correct, not just one side.
If the square is off, do not carry on and hope for the best. Recheck the settings and print again.
That small pause saves time. I have seen sewists shrug off a 2mm error, only to find that facings, waistbands, and sleeve heads no longer behave as drafted. Small scale errors spread across the whole pattern.
What usually causes a bad test square
The same problems come up again and again:
- Printing from the wrong program. Browser print tools and Preview often change scaling behind the scenes.
- Helpful printer defaults. Auto-fit options are common and easy to miss.
- Measuring too casually. A soft tape measure can shift. A ruler gives a cleaner check.
- Checking only one side. A square can be right in width and wrong in height.
This step builds confidence for everything that follows. Whether you print the full pattern at home on A4 or send an A0 file to a UK copy shop, the test square tells you the file is behaving exactly as the pattern designer intended.
Printing at Home The A4 Tiled Method
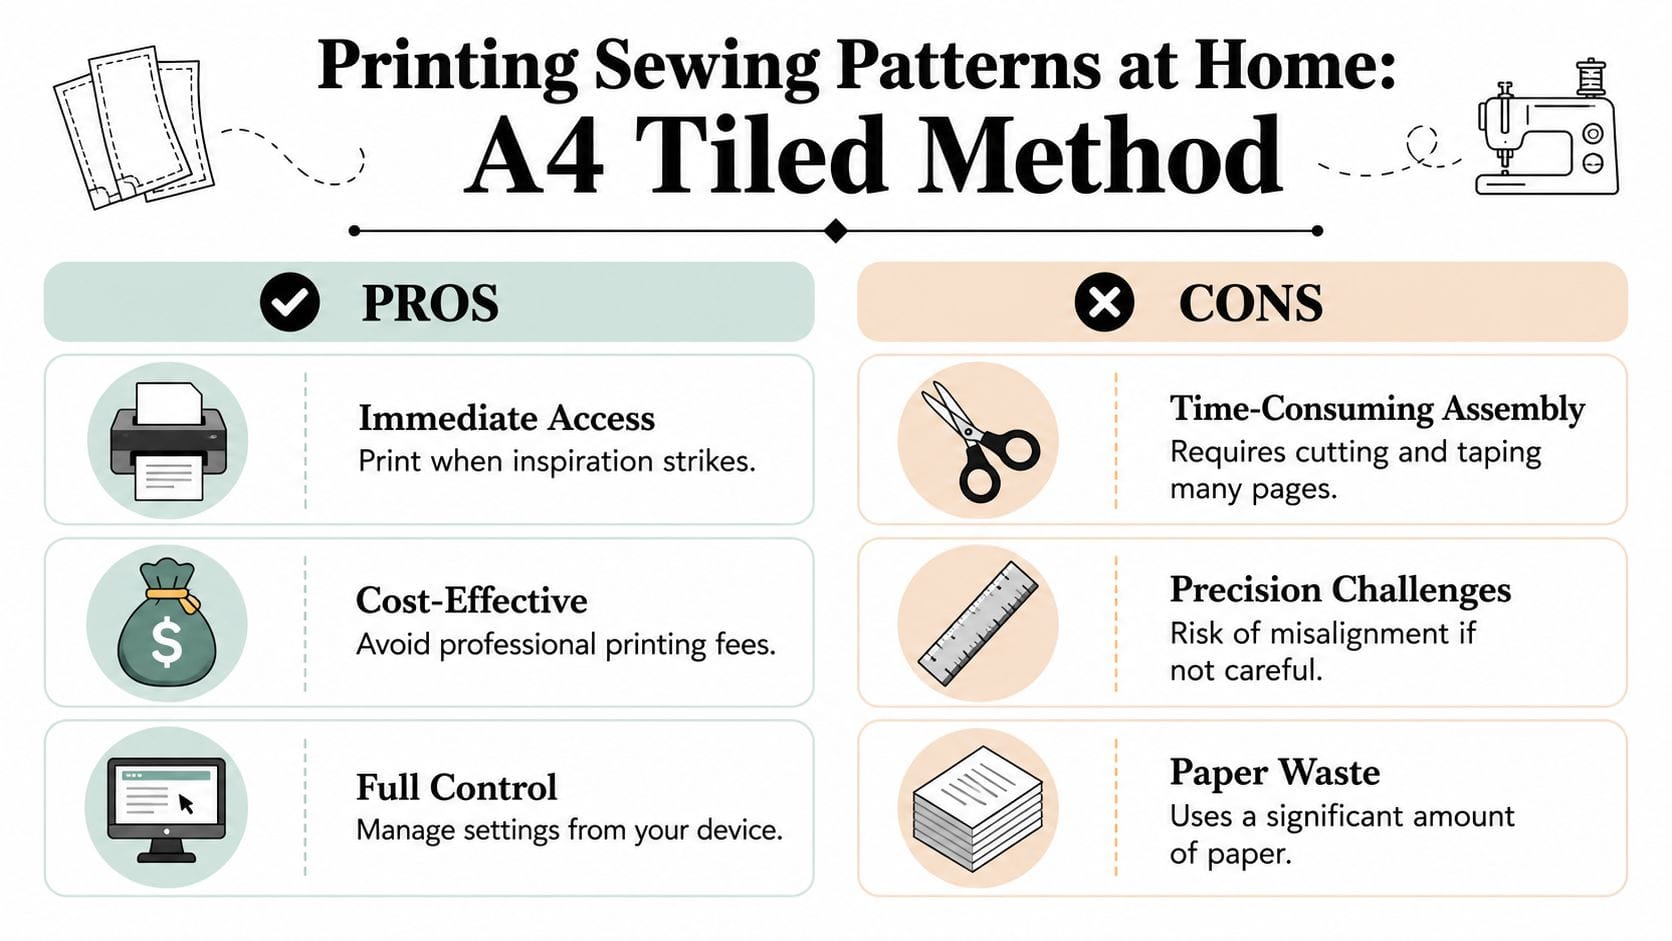
You have an hour before dinner, the fabric is washed, and you want to get started tonight. That is when A4 home printing earns its place. You can print what you need straight away, check a quick adjustment, and reprint a single page later if you change size or damage a piece.
For many sewists in the UK, that convenience outweighs the extra assembly. A4 is usually the better choice for toiles, children's clothes, simple tops, and any pattern you want to test before paying a copyshop fee. It is also useful if you are still deciding whether the style suits you. Printing at home gives you control from the first page to the final taped sheet.
The settings that prevent most home-printing problems
Once the test square is correct, set up the full file carefully. In Adobe Reader, turn off “Choose paper source by PDF page size”. That setting can interfere with tiled pages and give you inconsistent margins, which makes matching corners and alignment marks harder than it needs to be. Bethany Lynne Makes recommends Adobe Reader for the same reason. It gives more predictable scaling than a browser print window.
Large files deserve a short trial run. Print the first four to six pages, lay them out, and check that the page labels, overlap, and cutting lines all look clean. If a printer is going to pull slightly crooked or add a faint line through the toner, I would rather find out on page 3 than page 27.
If your printer offers “borderless” printing, leave it off unless the pattern designer specifically says to use it. Tiled sewing patterns are drafted around standard printable margins. Borderless settings can shift placement in ways that make assembly less tidy.
Paper choice and page handling
Standard 80gsm copier paper is fine for most patterns. It feeds well, folds easily at joins, and does not create too much bulk once you start taping. That is what I use for the majority of home prints.
Heavier paper has a place, but there is a trade-off. It feels nicer if you reuse pattern pieces often or pin directly through the paper many times. It also creates thicker seams where pages overlap, especially around curved areas such as armholes and necklines. For a long coat pattern with many pages, that extra thickness gets awkward fast.
Keep an eye on paper size if you buy supplies in the UK. A4 is standard here, but some home printers default to US Letter after an update or reinstall. That small mismatch can cause confusion even when your scale setting is right, because the page frame and margins change. If your printer behaves oddly and you have checked the scale already, confirm the machine itself is set to A4.
A workflow that keeps the pile under control
Order matters more than speed here. A4 printing goes wrong on the table, not in the PDF.
This method works well:
- Print the pattern pages only first if your file includes instructions in the same document.
- Stack pages by row or by page number as they come out instead of dropping them into one pile.
- Keep the layout chart visible on your laptop, tablet, or printed first page.
- Write a light pencil mark on the back of pages that belong to the same row if the labels are tiny.
- Check ink coverage early. Patchy lines are much harder to spot once everything is trimmed.
I also keep a small tray or folder beside the printer for finished pages. It sounds simple because it is simple, but it stops corners getting bent and pages drifting out of sequence.
Home printing suits sewists who like flexibility. You can print one size today, another later, or replace a single page after making an adjustment. If you decide the pattern is one you will sew repeatedly and want on a full sheet next time, you can always use a print shop for a future A0 copy. That decision is easier once you know the pattern is worth keeping in rotation.
The A0 Option Using a Copy Shop
A0 printing is the calm, low-drama option. You send the file, wait for the sheets to arrive or collect them locally, then work from a full-size pattern without trimming and taping dozens of pages. For large garments, it often feels less like admin and more like sewing.
The UK side of this has become much easier. The UK market for large-format A0 sewing pattern printing has grown by 42% since 2018, with services such as Savvy Sewist and Clickpost offering next-day delivery and an average cost of £8.50 per pattern, according to reporting referenced by Fabric Godmother.
What you gain and what you give up
A0 isn't automatically better. It's better for certain jobs.
| Factor | A4 Home Printing | A0 Copy Shop Printing |
|---|---|---|
| Start time | Immediate if you have paper and ink | Slower because you must order or travel |
| Assembly | Requires trimming and taping | No tiled assembly |
| Corrections | Easy to reprint a single page | Less convenient if one sheet needs replacing |
| Large pattern pieces | More joins to manage | Full-size pieces are easier to read |
| Workspace | Pages can spread everywhere | Fewer sheets, but larger ones |
| Cost style | Uses home ink and paper | One print fee per pattern |
For coats, trousers, and patterns with many long seams, I generally prefer A0. You can see the shape more clearly, the grainlines stay readable, and there's less visual noise.
UK-specific practicalities
When you buy a PDF pattern, look for the file labelled A0, copy shop, or sometimes large format. That is the version you upload. Don't send the tiled A4 file unless the printer specifically asks for something different.
Some sewists prefer specialist pattern printers because they understand sewing files and don't try to “helpfully” resize them. If you're using a general print shop, check their file requirements before sending anything. The useful question isn't “Do you print large sheets?” It's “Can you print PDF patterns at full scale with no resizing?”
Another practical choice is paper type. The Reddit discussion summarised in r/sewing recommendations for UK PDF pattern printing notes that services such as Pattern to Paper offer printing on pattern tissue rather than standard paper. Tissue is lighter, easier to fold, and easier to trace through. Standard large-format paper is sturdier and often easier to handle if you're using the printout directly.
Full-size printing doesn't save every project, but it does remove one entire category of mistakes.
If you dread assembly or you're sewing something complex, A0 is often money well spent.
Assembling Your Pattern with Precision
You have a stack of printed pages, the pattern pieces are split across half the table, and one rushed join can throw off a dart, a notch, or a grainline. Assembly is the point where accuracy stops being theoretical and starts affecting the fit of the garment.
Trim only what helps the pages overlap
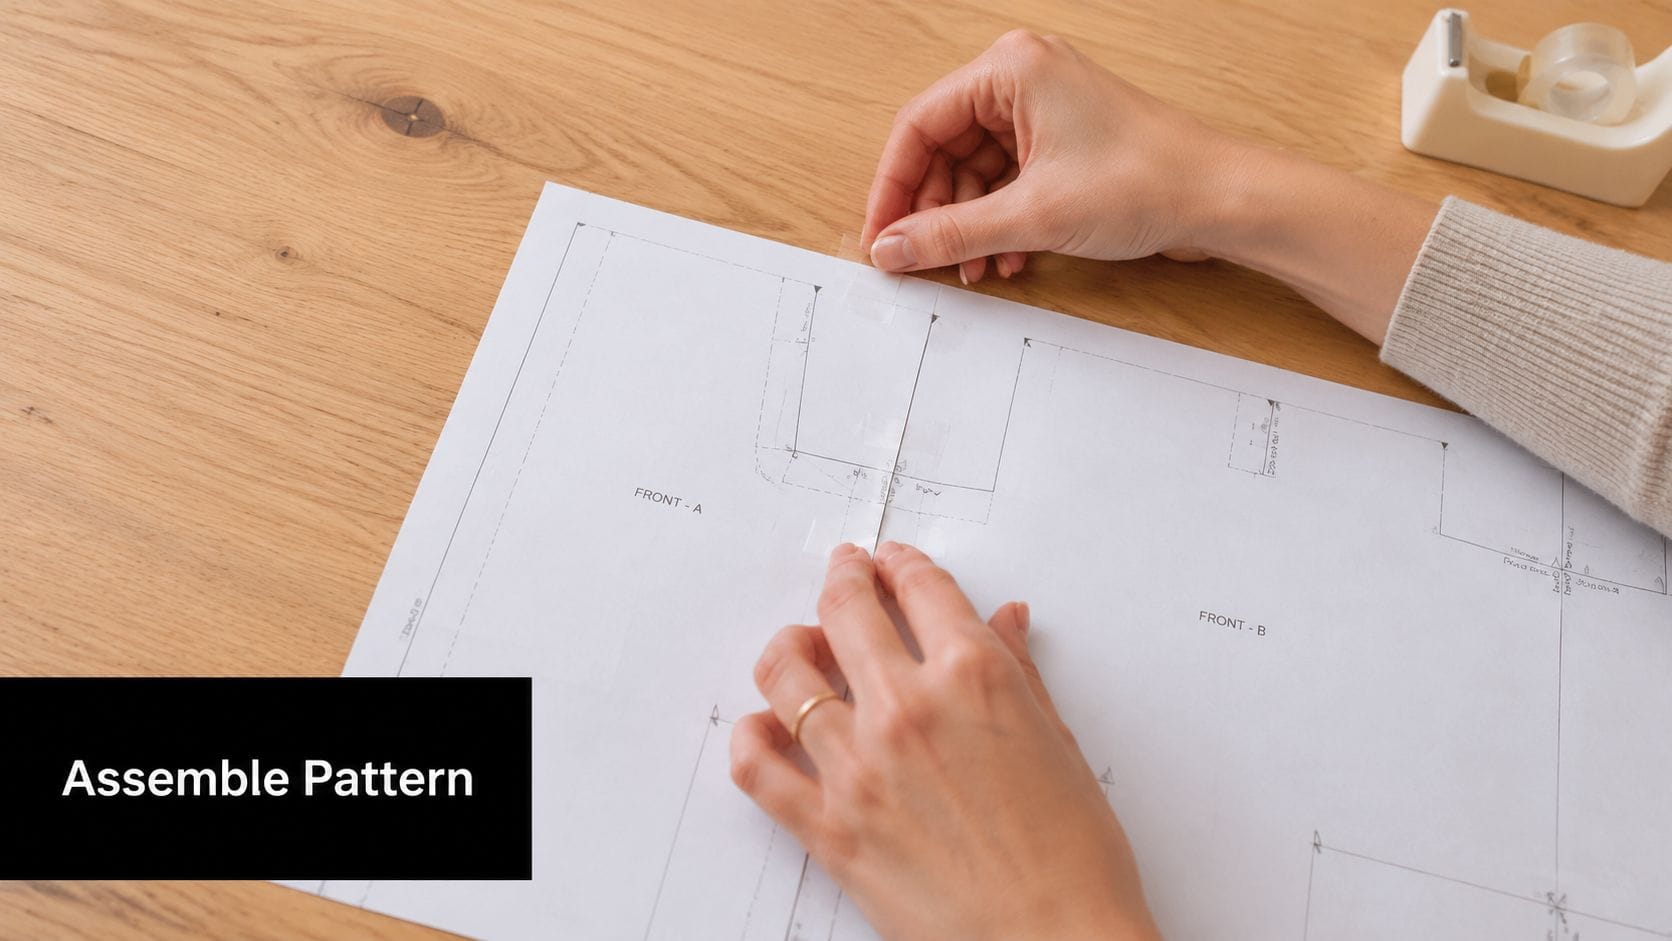
The method that gives the best balance of speed and accuracy is trimming two edges per page, usually the right and bottom. Melly Sews shows this clearly. It keeps the overlap consistent and avoids the fiddly job of cutting all four sides.
I use a rotary cutter, ruler, and mat whenever possible. Scissors work, but long cuts tend to wander, and that small drift shows up later when several pages meet in the same area. If you are printing a simple pattern with only a few tiles, scissors are usually fine. For a coat, trouser block, or anything with many pages, the rotary cutter earns its place.
Build the pattern in sections
Trying to tape the whole sheet in one go usually creates more handling than accuracy. A controlled order works better:
- Trim the overlap edges on the pages that need them.
- Lay out one row at a time using the page map in the pattern file.
- Match printed markers and pattern lines before committing with tape.
- Tape rows lightly first, then join the finished rows together.
- Reinforce key joins only after the full piece is sitting correctly.
That row-by-row approach is easier on a dining table and much easier to correct. If page 14 has slipped by a millimetre, you can fix one row instead of peeling apart a large taped sheet.
Match the printed information, not the paper edge
Paper edges are only guides. The main checkpoints are the grainline, notches, circles, seam lines, and cutting lines.
Due to variations in how home printers handle margins, a corner can look slightly off while the actual pattern is still correct. I tell students to trust the information that affects sewing. If the bodice side seam flows cleanly and the notch meets, the join is sound.
Prioritise pattern lines and registration marks over page corners.
For layered PDFs, this gets even more useful. If you have selected one size, follow that size line across the overlap and let the border fall where it falls. Curves often line up more accurately that way.
A short demonstration is often easier than written explanation when you're first learning the rhythm of it:
Tools and habits that make assembly easier
A few habits save a surprising amount of time:
- Use short bits of tape first so you can lift and adjust a join if needed.
- Work on a hard, flat surface. Carpet and padded ironing boards make accurate alignment harder.
- Check every few pages against a long line such as centre front, centre back, or grainline. Long straight references reveal drift early.
- Leave outermost edges untrimmed where there is no adjoining page. There is no benefit in cutting paper that will not overlap anything.
- Mark assembled sections with a pencil tick once checked. On large patterns, that stops you revisiting the same joins.
If you sew PDFs regularly, it is worth deciding whether you prefer taping or gluing. Tape is faster and more forgiving. Glue sticks give flatter joins and are easier to fold, but they need a little drying time and more careful placement. In workshops, I usually suggest tape for beginners and glue for sewists who already know they like to keep assembled patterns for reuse.
Assembly gets quicker with practice. The first tiled file often feels slow because every page needs a decision. After a few patterns, the sequence becomes automatic, and you can focus on checking the parts that really affect the finished garment.
Troubleshooting Common Printing Problems
You print the test square, it measures correctly, and then page 6 refuses to line up with page 7. That usually means the problem is local, not that the whole file is wrong. Once you know whether the fault sits with scale, page handling, or one awkward sheet, the fix is usually quick.
What if the lines don't match even though the test square was correct
Check the printed pattern lines first. Ignore the outer paper edges if they are distracting. Home printers can leave slight margin differences from page to page, and that can make corners look wrong even when the actual pattern is still accurate.
I tell students to follow a long seam line, dart leg, or grainline across the join. If those line up, the page is usually fine. If one sheet is consistently tilted or shifted, reprint that page only. Trying to force the full row into place often creates a bigger problem later in the layout.
If the mismatch runs through many pages, stop and check the print dialogue before using more paper. A setting may have changed after the test page, especially if the printer has switched paper source or reset to a default scaling option.
What if the file includes multiple sizes and looks cluttered
Layered PDFs are much easier to work with once you hide the sizes you do not need. In Adobe Reader, open the layers panel and leave on anything related to text, page labels, notches, and symbols. Then switch off the unused size layers.
That keeps the page readable and makes cutting more accurate. It also helps when you reach alterations, because you are not trying to trace through a tangle of nested lines. If your pattern has no layers, use a highlighter or pencil to mark your size before you cut.
What if the page margins are cropped or shifted
This usually comes from the printer settings rather than the pattern file. Check that the paper size is set to A4, the scale is at 100% or Actual Size, and any auto-fit or borderless option is turned off. Some printers handle borderless printing badly for sewing patterns and can enlarge the page without making it obvious.
Print one replacement page before committing to the rest. In UK homes, this problem often shows up when the printer driver automatically swaps between A4 and Letter presets after an update or after printing a document from a different program.
What if you trimmed the wrong edge
Keep the page. A wrong trim is annoying, but it rarely ruins the pattern.
Match the sheet by page number and registration marks, then tape a scrap of plain paper behind the join if you need to rebuild the overlap. I have done this many times during classes, and the repair is usually invisible once the section is assembled. A common mistake is carrying on too fast and repeating the same trim error across the next few pages.
What if the assembled pattern becomes impossible to store
Large PDF patterns get untidy quickly, especially A0 sheets from a copy shop or fully taped tiled sets. Storage wants a plan before the paper starts splitting at the folds.
Use one of these methods:
- Fold by major pattern piece so bodice, sleeve, and skirt sections open independently.
- Clip related pieces together with a binder clip or foldback clip after cutting.
- Store in a labelled A4 or A3 envelope with the pattern name, size, and any alteration notes on the front.
- Use a cardboard art wallet for A0 prints if you order copy shop patterns regularly in the UK and want to keep them flat for reuse.
Printing sewing patterns gets much less frustrating once you treat it as part of pattern preparation. A careful fix at the paper stage saves far more time than trying to correct a distorted piece in fabric.
If you're ready to turn a freshly printed pattern into something wearable, More Sewing is a useful UK resource for fabrics, haberdashery, dressmaking kits, and the practical supplies that make the jump from paper pattern to finished garment much smoother.
