Guides
Best Patterns for Wrap Skirts: Find Your Style
You’re probably here because you want one skirt pattern that won’t sit in a drawer after one wear. You want something comfortable, adjustable, and satisfying to sew. You also want to know which version will suit your shape, your fabric, and your sewing confidence before you cut into good cloth.
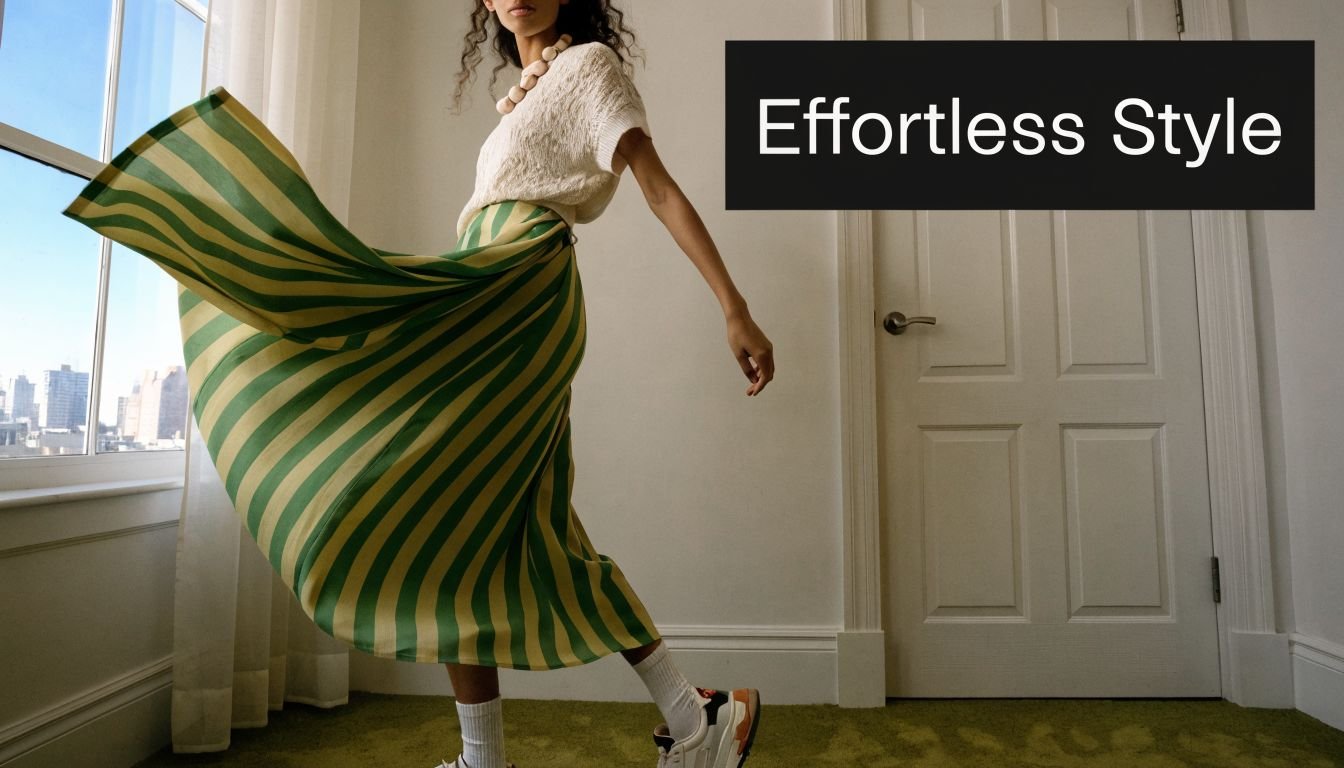
That’s exactly why wrap skirts stay so popular. In the UK, wrap skirt patterns surged 28% in sales from 2020-2025, with 1.2 million new hobby sewists joining the wider home sewing boom, and 35% aged 18-35 favouring versatile patterns, according to the figures cited in this UK wrap skirt trend reference. In Worthing, that same trend showed up locally through increased sewing machine repairs and more skirt projects, which makes sense. A wrap skirt is forgiving, wearable, and easier to fit than many zipped styles.
A good wrap skirt can be crisp and practical in cotton, soft and swishy in viscose, or neat and modern in denim or twill. The pattern choice changes all of that. So does the angle of the wrap, the amount of overlap, and whether the fabric holds shape or drops close to the body.
An Introduction to Sewing Wrap Skirts
Wrap skirts are one of the few projects that work for almost every stage of sewing. Beginners like them because many styles skip a zip. More experienced dressmakers like them because small design changes make a big difference to the finished look.
The useful thing about patterns for wrap skirts is that they don’t all behave the same way. A straight wrap sits very differently from a half-circle wrap. A tulip shape creates softness around the front. An asymmetric hem pulls the eye downward and adds movement. If you’ve ever made a skirt that looked lovely on the pattern envelope but felt wrong when worn, the issue was often the relationship between shape, fabric, and body.
Why sewists keep coming back to them
Some garments ask you to commit to one fit. Wrap skirts give you a little room to live in them. That matters if you prefer comfort at the waist, if your measurements sit across more than one pattern size, or if you want a garment that feels easy on ordinary days.
A wrap also teaches strong dressmaking habits:
- Pattern reading means checking overlap, tie placement, and hem shape before cutting
- Fabric judgement means learning which cloth needs body and which needs drape
- Fit assessment means noticing where the skirt sits at the waist, hip, and front opening
- Finishing skills mean handling long edges, curved hems, waistbands, and ties neatly
Practical rule: If you want a skirt that forgives small fitting errors, start with a wrap. If you want sharp tailoring, choose a structured wrap. If you want movement, choose a drapey one.
The most helpful way to choose isn’t by asking which wrap skirt is “best”. It’s by asking what you want the skirt to do. Do you want it to skim the hips, flare out, stay secure on a windy day, or work with a fabric you already own? Once you answer that, the right pattern becomes much easier to spot.
Decoding Wrap Skirt Patterns Key Styles Explained
The term “wrap skirt” covers several different silhouettes. Some are almost architectural. Others are soft and fluid. If you only look at line drawings, they can seem similar. In wear, they are not.
Wrap skirts have history on their side too. Wrap skirt patterns first appeared in sewing catalogues around 1927, including McCall’s Pattern 1480. Even after hemlines dropped 12-18 inches after 1929, the style adapted and stayed relevant. In the UK, home sewers made over 2.5 million custom skirts annually, and wrap styles were valued for fabric efficiency during harder economic periods, as described in this historical overview of early wrap skirt patterns. That history matters because it explains why the style still works. It adjusts, layers, and earns its place in a wardrobe.
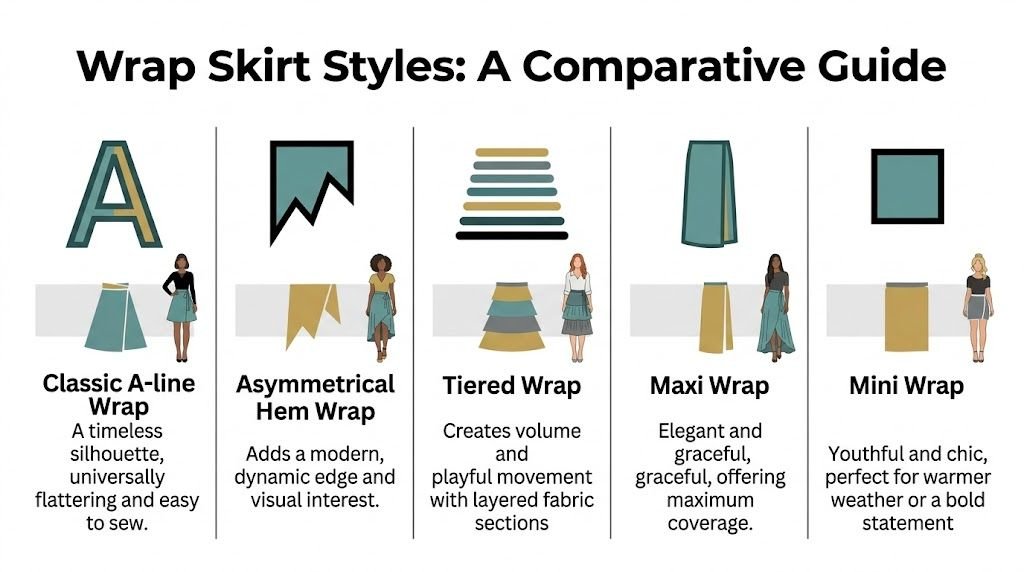
The classic wrap
This is often the style pictured first. One front overlaps the other and ties or buttons into place. The shape is often straight or gently A-line.
Why choose it? Because it’s balanced. It doesn’t demand a dramatic fabric and it suits a wide range of wardrobes. In a cotton lawn or light denim, it looks clean and everyday. In a softer cloth, it becomes more relaxed.
This style usually suits sewists who want:
- Straightforward construction with fewer closures
- Easy layering with knitwear, shirts, or simple tops
- A flexible fit through the waist
The faux wrap or half-wrap
A faux wrap gives the appearance of a wrap but includes a fixed section, often with a side seam or waistband structure doing more of the work. This makes it a good choice if you love the look of a wrap but dislike the possibility of the front shifting open.
It often feels neater through the waist and hip than a loose classic wrap. If you want a skirt for workwear or frequent wear, faux wraps are worth serious consideration.
A faux wrap is often the answer when someone says, “I like wrap skirts, but I don’t want to keep adjusting it.”
The tulip wrap
Think of this as overlapping petals. The front curves inward and crosses softly over itself, narrowing a little toward the hem. The effect is elegant and slightly dressier.
This shape works well when you want softness at the front without a lot of flare. It can flatter fuller hips beautifully because the eye follows the curved overlap rather than a rigid side line. The catch is fabric choice. If the cloth is too stiff, the tulip can look bulky instead of fluid.
The waterfall wrap
This style relies on drape. The front edge falls in soft folds rather than sitting in a crisp line. In the right fabric it looks relaxed and graceful. In the wrong fabric it can feel limp or awkward.
Best uses:
- Viscose or Tencel for liquid movement
- Midi or maxi lengths where the drape has room to show
- Softer styling with fitted tops or simple knitwear
The asymmetric wrap
An asymmetric wrap shifts the front line, the hem, or both. It can feel sharp and contemporary, even when the rest of the skirt is simple. This style is especially useful if you like modern silhouettes or want visual interest without prints.
Here’s a quick comparison.
| Style | Best known for | Fabric mood | Final look |
|---|---|---|---|
| Classic wrap | Easy versatility | Stable or softly draped | Timeless |
| Faux wrap | Security and polish | Stable fabrics | Neat |
| Tulip wrap | Soft curved front | Light drape | Elegant |
| Waterfall wrap | Movement | Fluid fabrics | Relaxed |
| Asymmetric wrap | Visual edge | Stable or drapey, depending on hem | Modern |
If you’d like a broader fashion view before choosing a sewing pattern, Cedar & Lily Clothier has a useful piece on understanding the nuances of wrap styles. It’s about wrap garments more generally, but the silhouette thinking applies neatly to skirts too.
Selecting Your Ideal Fabric from the More Sewing Range
The right fabric doesn’t just change how a skirt looks. It changes how the wrap behaves when you sit, walk, and tie it. That’s why the best patterns for wrap skirts are never really separate from fabric choice.
If you want shape
Choose a fabric with a bit of body. Cotton lawn, poplin, lightweight twill, chambray, or a softer denim all help a classic or faux wrap hold its outline. These fabrics make waistbands easier to handle and ties easier to press sharply.
A structured fabric is often the safer choice for a first wrap skirt because it’s less likely to creep or collapse while you sew. It also shows topstitching nicely, which is useful if you want a practical finish.
Good uses include:
- Classic A-line wraps that need crisp edges
- Mini wraps where too much drape can make the front flip awkwardly
- Utility-inspired styles with pockets or topstitched seams
If you want flow
Viscose and Tencel blends are excellent when you want the skirt to move close to the body instead of standing away from it. They suit waterfall wraps, tulip fronts, and longer asymmetric hems particularly well.
The reason is simple. A drapey fabric softens the line of the overlap. Instead of a stiff front panel, you get a smoother fall through the hip and thigh. That can feel more elegant and less bulky, especially in midi lengths.
Soft drape flatters the design, not just the figure. A wrap with curved edges wants fabric that can follow the curve.
If you want comfort
Jersey can work well for some faux-wrap styles, especially those drafted with a fixed waistband or a more secure side seam arrangement. The stretch makes everyday wear easy, but it can also make ties and waist edges wavy if you don’t stabilise them.
If you use jersey:
- Interface the waistband area if the pattern allows
- Staystitch key openings before handling
- Test tie length because knit ties can stretch with wear
A practical matching guide
| Pattern style | Fabric to try | Why it works |
|---|---|---|
| Classic wrap | Cotton lawn or light denim | Holds shape and presses well |
| Faux wrap | Twill or ponte-style knit | Feels secure and tidy |
| Tulip wrap | Viscose or soft crepe-like fabric | Curves without stiffness |
| Waterfall wrap | Tencel blend | Gives a fluid front edge |
| Asymmetric wrap | Chambray, viscose, or twill | Depends on whether you want crispness or swing |
If you’re standing in front of folded fabric and hesitating, scrunch a corner in your hand and then let it drop. If it springs back into shape, expect a cleaner outline. If it falls in a soft line, expect more movement. That single test tells you a lot.
Mastering the Fit Sizing and Common Adjustments
A wrap skirt can be forgiving, but it still needs the right starting size. The biggest fitting mistake isn’t choosing the “wrong body”. It’s choosing the wrong pattern size and hoping the ties will sort everything out.
In UK sewing, this matters for inclusivity too. Adapting wrap skirt patterns for plus-size figures is a frequent concern, especially where the average women’s dress size is 16-18, and 40% of hobbyists are size 14+ and actively looking for clearer inclusive guidance, according to this wrap coverage and inclusive sizing discussion. That’s why coverage, overlap, and hip shape all deserve proper attention.
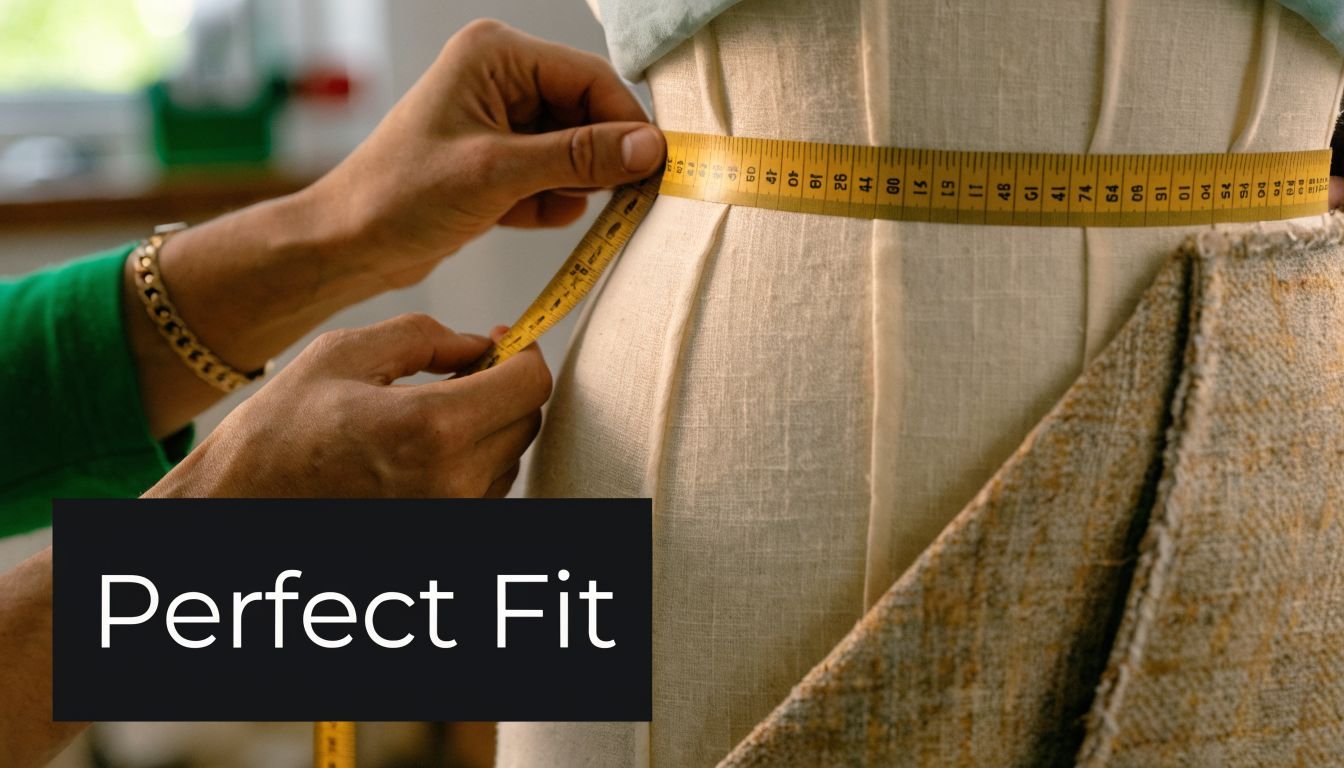
Start with two measurements
Take your waist where you want the skirt to sit, not where a pattern assumes it sits. Then take your full hip at the widest point. For many people, the waist choice is what changes the whole fit. A wrap worn at the natural waist behaves differently from one worn lower on the body.
Check those measurements against the pattern chart. If your waist and hip fall into different sizes, don’t panic. That’s normal.
A simple approach works well:
- Choose by hip first if the skirt is straighter through the body.
- Choose by waist first if the skirt is very flared and the hip has more room.
- Blend between sizes on the pattern rather than forcing one size throughout.
Where sewists usually get stuck
The front opening often causes the most confusion. If the skirt fits the waist but opens too much across the thigh, the issue isn’t always size. It may be insufficient overlap for your proportions.
Common signs you need an adjustment:
- The front pulls open when you sit or stride
- The side seam swings forward instead of hanging straight
- The waistband twists because one tie is carrying too much strain
- The hem dips oddly at the overlap point
More coverage usually comes from pattern adjustment, not from tying the waist tighter.
Use slash-and-spread for shape, not guesswork
Slash-and-spread sounds technical, but it’s a controlled way to add room where your body needs it.
For a fuller hip or seat:
- Mark the area that needs more width on the front pattern
- Slash vertically and spread slightly
- Keep the waist seam smooth
- Redraw the wrap edge so the overlap remains generous
For a fuller tummy:
- Add length and a little width at the front where the skirt travels over the abdomen
- True the hem afterwards so it doesn’t kick up at centre front
For a pear shape:
- Blend out at the hip more than at the waist
- Recheck that the underlayer still covers properly beneath the top wrap
A quick visual guide can help if you’re adjusting while sewing along at home:
Small changes that improve comfort
These aren’t dramatic alterations, but they often make the skirt feel much better:
| Problem | Adjustment | Why it helps |
|---|---|---|
| Too much leg showing | Extend wrap edge | Adds coverage |
| Waist feels firm after lunch | Add tie length or ease | Gives flexibility |
| Front hem hikes up | Add front length | Balances over tummy or hip |
| Side seam swings | Rebalance at hip | Improves hang |
When in doubt, make a toile in a similar-weight fabric. A wrap skirt toile doesn’t need every finishing detail. You mainly need to test hang, overlap, and tie position.
Simple Techniques for Drafting and Pattern Hacking
Once you’ve made one or two wrap skirts, drafting your own starts to feel far less mysterious. The key is to work from a shape you already trust. That might be a basic skirt block, or it might be a pattern that fits you well through the waist and hip.
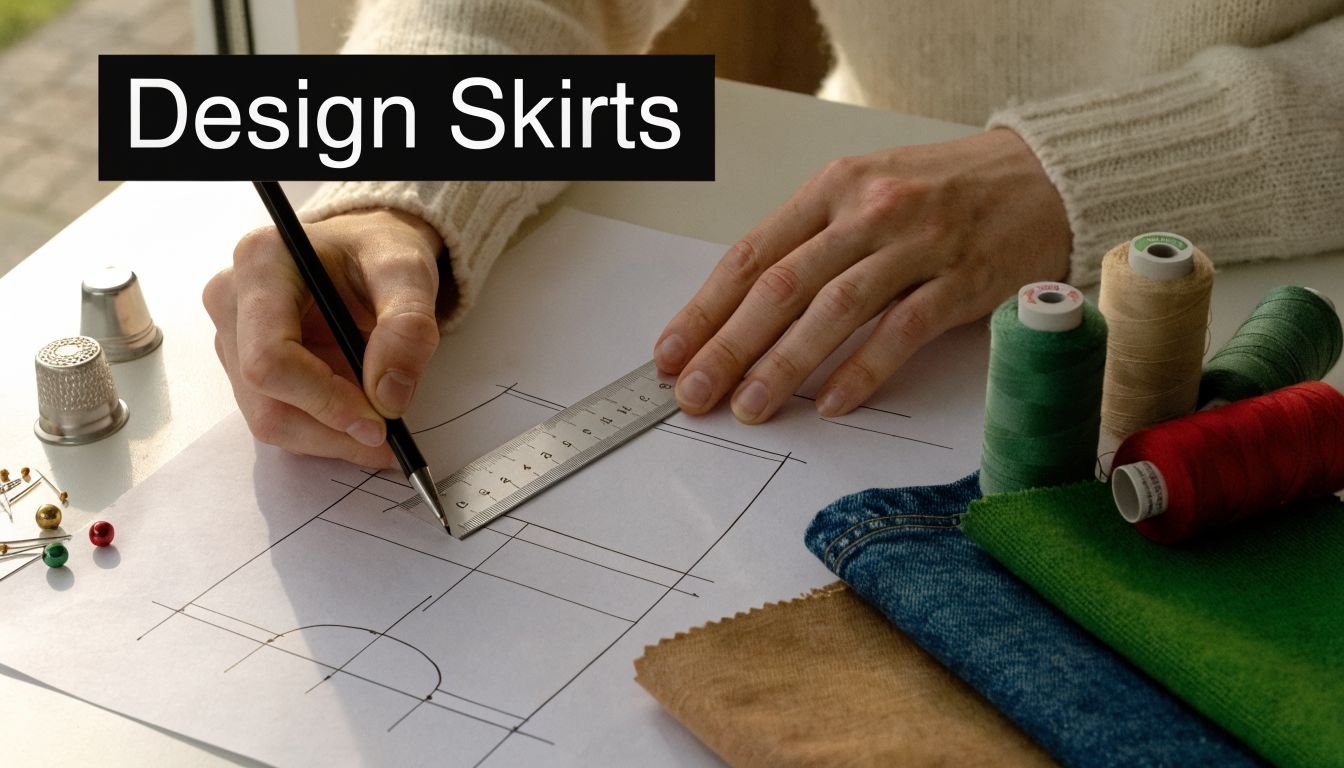
A useful drafting reference notes that a wrap skirt from a standard UK size 10-14 block uses an underlap extension of 10-15cm at the waist, creating a secure overlap and cutting sewing time by 20-30% compared with a zipped skirt. The same reference also points to using a calculator for half-circle wraps so the waist radius works for UK measurements, in this guide to drafting a wrap skirt from a basic block.
Draft a straight wrap from a basic block
This is the easiest place to begin if you like neat, everyday skirts.
Start with the front skirt piece traced as a full piece rather than on the fold. Mark the grainline clearly. Then extend the underlap at the waist by 10-15cm. Square that extension down cleanly so the new front edge doesn’t wobble or narrow awkwardly.
Why that extension matters:
- It creates the overlap that keeps the front secure
- It gives room for tie or button placement
- It prevents the skirt from acting like a barely-closed apron
After that, decide where the opening should cross the body. A steeper diagonal creates a more obvious wrap look. A straighter line feels cleaner and more understated.
If a drafted wrap looks skimpy on paper, it will look skimpier on the body.
Draft a half-circle wrap
A half-circle wrap gives more sweep and movement. It’s a very different garment from a straight wrap even though both tie at the waist.
The process is more geometric:
- Measure the waist where the skirt will sit
- Add ease and seam allowance as required by your method
- Use a calculator to find the waist radius
- Plot the curve carefully
- Add the front overlap before cutting
This style suits fabrics that can hang well on the bias. If the fabric is too rigid, the extra flare can feel bulky. If it drapes nicely, the skirt will move beautifully.
Easy hacks that change the look fast
Pattern hacking doesn’t have to mean redrafting from scratch. You can change the feel of a wrap skirt by altering just one feature.
Try:
- Widening the tie ends for a softer bow
- Adding a shaped waistband for a more polished waist fit
- Squaring the hem for a sharper look
- Curving the front edge for a gentler line over the leg
- Lengthening to midi if you want more swish without changing the whole pattern
If you like designing your own look, custom print can also play a part. A fabric with your chosen scale or motif can completely change a simple wrap, and this overview of custom fabric printing services is a useful starting point for understanding that option.
Sewing and Troubleshooting Your Wrap Skirt
The difference between a wrap skirt that feels homemade and one that feels polished often comes down to three details. The ties, the hem, and the point where the wrap is secured.
Sew ties that stay tidy
Cut ties with enough width to turn neatly without becoming rope-like. If your fabric is soft or stretchy, interface part or all of the tie so it doesn’t grow with wear. Pressing matters here more than people expect. A tie that’s carefully pressed before topstitching looks much smarter.
If you dislike floppy bows, make one tie narrower and slightly firmer. The knot will sit better and won’t drag the waistband downward.
Finish the hem according to the curve
A long curved hem can pucker if you force it into a deep single turn. A narrow double-turned hem usually behaves better. On very drapey fabric, a rolled hem foot can save time. On awkward curves, bias binding gives control and a clean inside finish.
Match the finish to the cloth:
- Stable cottons handle a pressed narrow hem well
- Drapey viscose or Tencel often benefit from a very narrow hem
- Denim or twill may look better with a deliberate topstitched edge
Stop gaping before it starts
Most gaping comes from one of four causes. Too little overlap, tie placement that pulls in the wrong direction, a wrap edge that stretches out, or a body shape that needs more front coverage.
Useful fixes include:
- A hidden snap at the inner layer
- Staystitching the wrap edge early so it doesn’t relax
- Moving the tie point so the skirt closes where your body needs it
- Adding a buttonhole opening in the waistband for a cleaner pull-through
A secure wrap skirt shouldn’t rely on one knot doing all the work.
If the skirt twists as you walk, check whether the waist seam is level on your body. If the front flips outward, the fabric may be too stiff for the pattern shape. If the inner layer creeps up, add a discreet anchor point inside. Small technical changes often solve what looks like a big design problem.
Your Next Steps with More Sewing Kits and Tools
The best patterns for wrap skirts make sense when you match three things properly. The silhouette, the fabric, and the kind of fit support you need. Get those right, and the sewing itself becomes much more enjoyable.
For a first project, keep life simple. Choose a classic or faux wrap in a stable woven fabric. If you already know you love softer garments, move toward a tulip or waterfall shape in viscose or Tencel. If fitting has put you off skirts before, spend your energy on overlap and waist position rather than chasing a shop-size label.
A few tools make the process smoother:
- A flexible tape measure for accurate body measurements
- Pattern paper for tracing and slash-and-spread adjustments
- A curved ruler for redrawing front edges and hips
- Sharp fabric shears or a rotary cutter for clean wrap edges
- Interfacing for waistbands, tie ends, and buttonhole areas
- A point turner or blunt knitting needle for crisp ties
- A rolled hem foot if you love sewing drapey fabrics
If you want a low-stress route, an all-in-one kit is often the smartest choice. It cuts down decision fatigue because the fabric, core notions, and project plan are already organised. If you prefer building your own setup, start with one reliable fabric, one simple pattern, and the haberdashery needed to finish it properly.
The nicest part of sewing wrap skirts is that they teach you how design choices affect wear. You start noticing why one front edge sits flatter, why one fabric swings better, or why one waistband feels more secure. That kind of understanding carries into every other garment you sew.
If you’re ready to make your own wrap skirt, More Sewing is a great place to start for quality dressmaking fabrics, haberdashery, and beginner-friendly kits. You’ll find cottons, viscose and Tencel blends, jerseys, denims, deadstock options, and practical tools that make fitting, drafting, and finishing much easier.