Guides
Why Pre Washing Fabric Before Sewing Is Essential
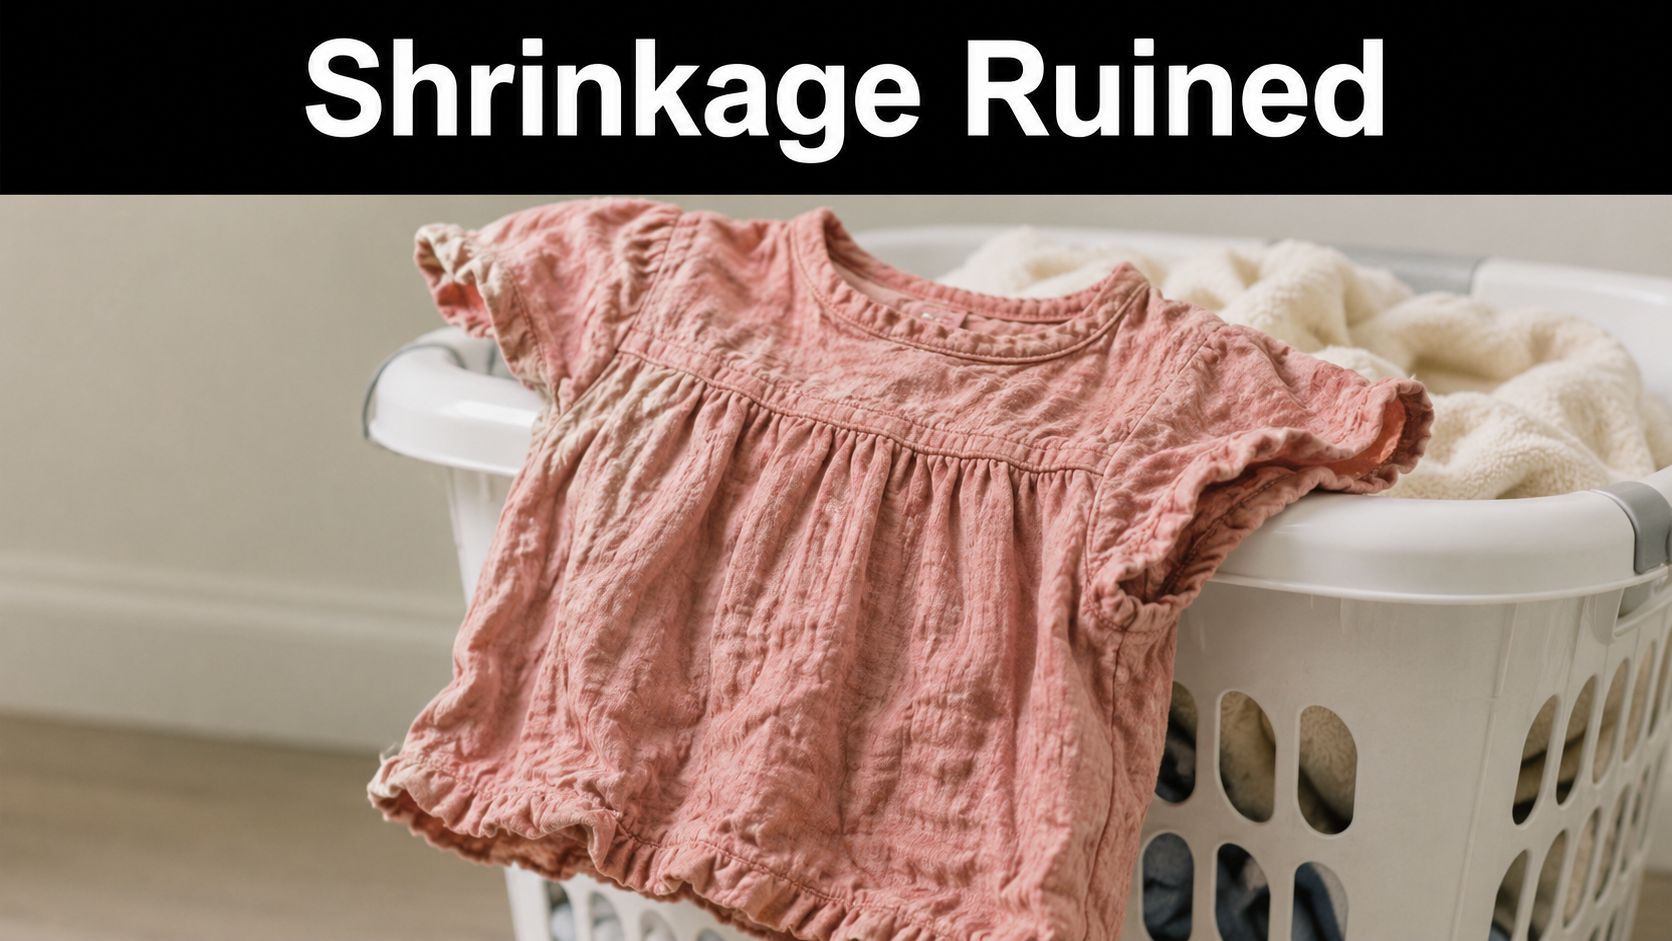
You've washed the fabric, cut carefully, stitched neatly, pressed every seam, and the finished garment looks spot on. Then it goes through its first wash and comes out shorter, tighter, twisted, or with colour where it shouldn't be. That's the moment most sewists stop treating pre washing as optional.
In a sewing shop, this is one of the most common conversations. Someone falls in love with a cotton print, a fluid viscose, or a piece of deadstock, and wants to get cutting straight away. I understand the temptation. Fresh fabric is exciting. But pre washing fabric before sewing is one of those habits that protects everything that comes after it, including your fit, your finish, and the hours you put into the project.
The useful question isn't just “Should I pre-wash?” Most of the time, yes. The better question is, “What does this fabric need, and what's the lowest-risk way to prepare it?”
Why Pre-Washing Is a Crucial First Step
The first wash is where fabric tells the truth.
A lot of cloth looks stable on the bolt. It feels smooth, crisp, flat, and obedient. That doesn't always mean it will behave that way once water, agitation, and drying get involved. Factory finishes can make fabric feel more controlled than it really is, and some fibres don't reveal their movement until they've been washed properly.
Shrinkage changes real garments
This isn't old sewing folklore. A UK fabric guide notes that cotton can shrink by around 5% in normal pre-washing, and shrinkage of up to 10% is not uncommon in some fabrics. It also points out that with a 1.5 m cut, 5% shrinkage can remove about 7.5 cm of length, which is enough to affect fit, hem depth, and pattern placement, as explained in this UK pre-washing guide from Kokka Fabrics.
If you've ever had a top suddenly sit above the waistband, or a dress hem creep higher than planned, that's the kind of change we're talking about. It doesn't take dramatic shrinkage to spoil a carefully balanced garment.
It also deals with dye and finish problems
Shrinkage is only one reason. Pre washing also helps remove excess dye, factory finishes, and residues before you cut. Those finishes can affect how the fabric presses, how it drapes, and how it behaves under the machine.
Practical rule: If the finished item will be washed, the fabric should experience that care routine before you cut into it.
That matters even more for everyday dressmaking. Most home-sewn clothes aren't treated like archive pieces. They're worn, washed, dried, pressed, and worn again. If the fabric is going to live a normal life in a normal laundry routine, you want to know that before the pattern pieces are on the table.
Why this step saves time rather than wasting it
Skipping pre washing feels faster. Usually it isn't. It can leave you dealing with one of the following:
- A fit problem that wasn't in the pattern but appears after laundering
- A colour issue that shows up while pressing or handling darker cloth
- A texture shift that makes the finished garment feel different from what you expected
- A cutting problem because the fabric relaxes after sewing, not before it
I always tell customers the same thing. Fabric is cheaper than your time, but both matter. If a short wash and proper dry lets the cloth settle before you sew, that's good preparation, not a delay.
The aim isn't to follow a rule for the sake of it. The aim is to make fabric behave predictably before it becomes a garment.
Your Essential Pre-Washing Toolkit
Good pre washing starts before the fabric goes anywhere near water. A little preparation stops most of the messier problems, especially fraying, twisting, and dye transfer.
The basics worth keeping beside the machine
You don't need a specialised studio setup. A small working kit is enough:
- Pinking shears or a sewing machine with zigzag or overlock stitch. These help control fraying on woven fabrics before washing.
- Mesh laundry bags. Very useful for jerseys, lightweight viscose, and anything that likes to stretch or tangle.
- Colour catchers. Handy when you're dealing with bold prints, dark navy, black, bottle green, or rich red.
- Mild detergent. Use it lightly, especially on delicate fibres.
- A basin or clean sink. Better for hand-soaking fabrics that don't enjoy machine agitation.
- Drying rack or clean towel. Essential for fabrics that shouldn't be hung dripping wet.
- Iron and ironing board. Pressing after washing is part of the prep, not an optional extra.
What each item actually prevents
The most overlooked step is finishing the raw edges. Wovens can come out of the wash with long thread tangles, chewed corners, and a surprising amount of wasted cloth. A quick run of zigzag stitching down each cut edge takes only a minute and can save a lot of annoyance.
Mesh bags are one of those simple shop-floor recommendations that solve more than people expect. If a jersey curls, snags, or stretches in the wash, I'll almost always put it in a bag first. The same goes for lightweight rayon-type fabrics that can twist around themselves.
If a fabric already looks slippery, loose, or delicate in your hands, protect it before washing. It won't become tougher in the machine.
A simple washing station setup
I like to set up in this order:
- Unfold the fabric fully so it doesn't wash with hard creases trapped in place.
- Check the cut edges and finish them if the weave looks open.
- Separate darks from lights if there's any chance of dye release.
- Choose machine or hand wash based on fibre and structure, not just habit.
- Keep pressing tools ready for when the fabric is dry enough to flatten properly.
That last part matters. Pre washing fabric before sewing works best when it's treated as one complete preparation stage. Wash, dry, inspect, press, then cut.
A Fabric-by-Fabric Guide to Pre-Washing
Not every fabric needs the same treatment. Blanket advice often catches sewists out. “Always prewash” is broadly useful, but it doesn't tell you how to handle a crisp cotton poplin versus a slinky viscose challis or a heavy denim.
Cotton and linen
Cotton and linen are the fabrics I'd class as high-priority candidates for pre washing, especially for garments. They're widely used, comfortable to wear, and often expected to survive frequent laundering. They're also the ones people most often assume are “safe” because they feel stable on the bolt.
If I'm preparing cotton lawn, poplin, linen blends, or linen-look wovens, I usually secure the edges first and then wash them in the same way the finished garment will be cared for. For shirts, dresses, pyjama bottoms, and everyday tops, that usually means a normal domestic care method rather than anything precious.
Cotton and linen often improve after washing. They relax, soften, and show you their true handle. That's a good time to check whether the fabric has gone slightly off grain before pressing it flat.
Viscose, Tencel and rayon
These are lovely to wear and lovely to drape, but they can be awkward in prep if you rush them.
Viscose-type fabrics often feel smooth and fluid before washing, then become a bit unruly once wet. They can wrinkle heavily, distort if handled roughly, and feel weaker when saturated. For that reason, I treat them gently from the start. A soft hand soak or a gentle machine cycle is usually the safer route.
According to Seamwork's guide to pre-washing fabric, pre-washing can remove excess dye that might otherwise transfer onto fingers or ironing boards while sewing. The same guidance recommends a gentle cycle, using around one quarter of normal detergent, soaking by hand for roughly 45 minutes to 1 hour, and avoiding wringing or tumble drying to protect delicate fibres.
That guidance lines up with what works in practice. Don't twist viscose. Don't bundle it up wet. Support it properly when lifting it out of the basin or machine.
Jersey and other knits
Knits need a different mindset. The risk isn't only shrinkage. It's also stretch distortion.
A cotton jersey, viscose jersey, ponte, or rib knit may come out perfectly usable after pre washing, but only if it's handled in a way that respects its elasticity. I tend to use a mesh bag for lighter knits and avoid overloading the machine. Once washed, I prefer to dry many knits flat rather than hanging them, especially if they're soft and drapey.
Watch for edge curl after washing. That isn't a disaster, but it does mean the fabric may need a good steam press and a quiet rest on the cutting table before you lay out pattern pieces.
Denim
Denim deserves respect before it becomes jeans, pinafores, jackets, or skirts. Dark denim in particular can release colour early on, and stiffer denims often soften noticeably after washing.
For darker shades, I'd wash separately the first time. If I'm preparing denim for a project where topstitching and precise shaping matter, I want to see the fabric in its settled state first, not after construction. Pre washing also gives you a chance to find out whether the cloth will become more supple, more crumpled, or more cooperative under the iron.
If the denim frays badly at the cut edge, finish it before washing. Heavy twills can shed long threads surprisingly fast.
Wool
Wool is where the “always prewash” rule starts to need more thought. If the fabric is intended for a garment that will be dry-cleaned or carefully steamed rather than routinely machine washed, I wouldn't automatically put it through a full wash. With wool coatings, suiting, and some delicate blends, steaming and pressing can be the better preparation method.
The point is to match preparation to future care. If the finished garment won't ever go through a standard wash cycle, forcing that treatment on the fabric at the start may create a problem rather than prevent one.
Deadstock and bold prints
Deadstock is rewarding because it's often unusual, characterful, and hard to find twice. It can also be less predictable. Fibre content may be mixed, previous finishing may be unclear, and dye stability can vary from one piece to another.
With deadstock, I rarely assume anything. I test, wash gently, and inspect closely. Bold prints and saturated shades also deserve caution, especially if your project includes contrast fabrics, linings, facings, or pale details.
Some fabrics don't ask for a dramatic wash. They ask for a careful first encounter with water so you can see how they behave.
Fabric pre-washing cheat sheet
| Fabric Type | Method | Temperature | Key Tip |
|---|---|---|---|
| Cotton | Machine wash | Wash as the finished garment will be washed | Finish raw edges first if the weave frays |
| Linen | Machine wash or gentle wash | Match intended garment care | Press while slightly damp for easier flattening |
| Viscose | Gentle machine or hand soak | Keep it gentle and consistent with future care | Don't wring or tumble dry |
| Tencel and rayon | Gentle machine or hand soak | Match final care routine | Support wet fabric to avoid distortion |
| Jersey | Gentle machine wash | Same care as final garment | Use a mesh bag and dry flat if needed |
| Denim | Separate machine wash | Match future laundering | Wash dark denim alone first if colour release is likely |
| Wool | Usually steam or careful prep instead of routine washing | Follow intended care | Don't force a wash if the garment will be dry-clean only |
| Deadstock | Test first, then gentle wash if suitable | Start cautiously | Treat unknown fibre mixes conservatively |
How to Measure and Account for Shrinkage
If you want to make better decisions, test the fabric instead of guessing. This is the most practical habit I can recommend to beginners and experienced dressmakers alike.
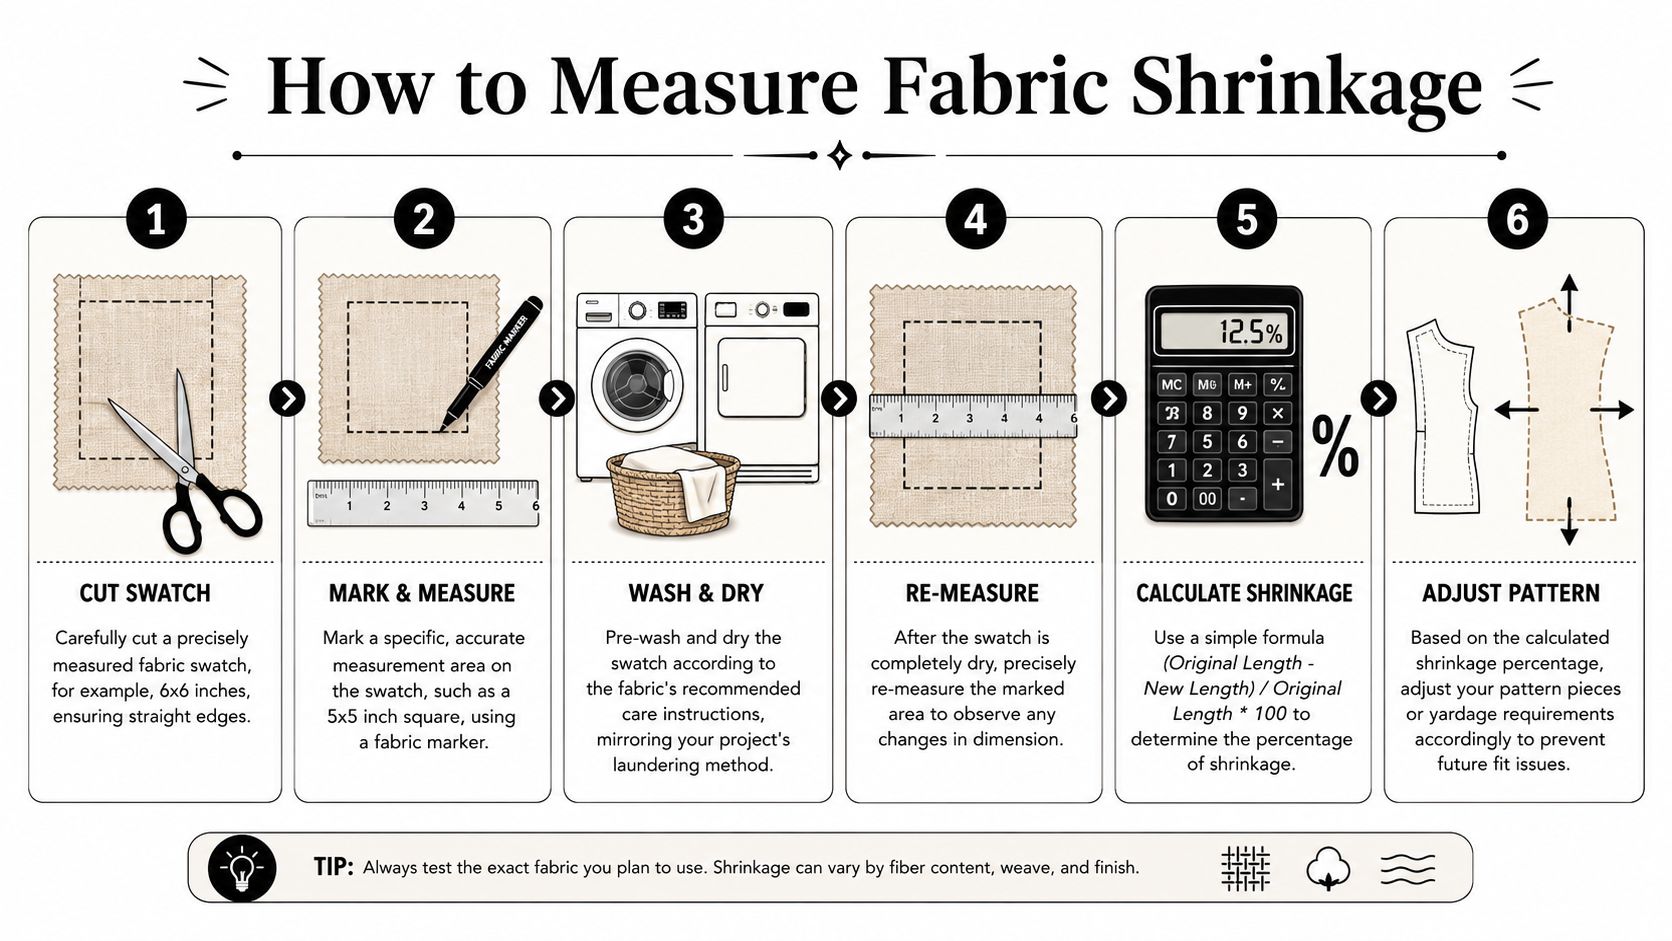
The easiest swatch test
A useful benchmark from Charlotte Kan's guide to pre-washing fabric is that cotton commonly shrinks by around 5% after washing. The same guide recommends testing a 10 cm swatch before cutting. If it shrinks from 10 cm to 9.5 cm, that confirms a 5% shrinkage rate.
That's why a swatch test matters. It turns a vague worry into something measurable.
Use this method:
- Cut a square swatch from the fabric.
- Mark a measured area clearly so you can re-measure accurately after washing.
- Wash and dry it using the same method planned for the finished garment.
- Measure again once fully dry.
- Note the difference and decide whether you need extra fabric or a layout adjustment.
For anyone who likes to see the sequence visually, this walkthrough is useful:
How to use the result on a real project
Once you know a fabric shrinks, you can plan around it instead of hoping for the best.
If your swatch confirms visible shrinkage, think about these points before cutting:
- Pattern placement. Border prints, directional motifs, and large repeats need stable dimensions.
- Garment length. Dresses, sleeves, and cropped tops show shrinkage quickly.
- Close fit areas. Bodices, waistbands, cuffs, and collars don't have much spare room.
- Lining and contrast fabric. If one fabric changes and the other doesn't, the garment can pull oddly.
Pre washing fabric before sewing is easier to live with when you treat testing as part of buying and planning, not a chore tacked on at the end.
When the swatch gives you a warning
Sometimes the swatch tells you more than the shrinkage rate. It may show:
- Colour release
- Texture change
- Excessive wrinkling
- A shift in drape
- Stretching at the edges
That's exactly what you want to know before your fabric is in forty separate garment pieces. A small test can save a lot of recutting, redrafting, or disappointment.
Best Practices for Drying and Pressing Fabric
Washing is only half the job. A lot of fabric problems blamed on pre washing happen during drying and pressing.

Dry the fabric in a way that protects its shape
A stable woven cotton can usually be line dried without much fuss. A drapey knit or viscose blend often needs more support. If a fabric stretches when wet, hanging it by one edge can pull it out of shape before it's even dry.
I usually sort drying choices like this:
- Flat drying for jerseys, soft knits, and delicate viscose
- Line drying for many cottons and linens
- Careful hanging only when the fabric can support its own weight well
Avoid rough handling at this point. Wet fabric is more vulnerable, especially anything fluid or loosely woven.
Press before cutting, not after you regret it
Fabric should be smooth, flat, and settled before it hits the cutting mat. Pressing helps remove wash creases, but it also helps you check whether the grain has shifted. If the grainline has wandered, you may need to straighten the cloth before laying out pattern pieces.
I always prefer to press fabric when it still holds a little moisture or has just been lightly re-steamed. It flattens more cleanly, and stubborn wrinkles don't get baked in.
A well-pressed piece of fabric is easier to cut accurately, easier to mark, and far less likely to fight you at the machine.
Check the grain before calling it ready
This is one of those experienced-sewist habits that makes a visible difference in the finished garment. After washing, some fabrics skew slightly. Side seams may twist later if you cut from cloth that wasn't trued up first.
Look along the weave or knit structure. If something seems pulled, stretched, or off-square, correct it before pinning the pattern. Five extra minutes here can prevent a garment that always hangs a bit wrong.
Common Mistakes and When to Skip the Wash
The biggest mistake is treating all fabrics the same. The second biggest is assuming “pre-washed” means “ready” without inspection, pressing, or thought about the finished garment's care.
Mistakes that cause trouble fast
A few problems come up again and again in home sewing rooms.
- Washing woven fabric with raw edges left loose. This creates fraying and thread tangles that waste usable cloth.
- Using too much detergent on delicate fabric. A lighter hand is better, especially on fibres that don't need a heavy wash.
- Wringing out viscose or rayon. That can distort the fabric before it even dries.
- Cutting before pressing. Freshly washed fabric often looks flatter than it really is.
- Ignoring dark dye release. If your fingers or ironing board pick up colour later, the warning was there at the start.
If dye does bleed unexpectedly, don't combine that fabric with lighter pieces straight away. Rewash cautiously on its own and keep testing with scrap or seam allowance areas before pairing it with anything pale.
When skipping the wash is reasonable
In this context, a more useful decision framework helps. Not every fabric needs the same level of preparation, and not every project needs a full wash cycle.
A more nuanced approach makes sense, especially in UK households that want to avoid unnecessary energy use. One source discussing fabric prep notes that washing at 30°C uses about 38% less energy than a 40°C wash, which supports a more selective approach to pre washing rather than a blanket rule, as mentioned in this discussion of washing fabric before sewing.
That doesn't mean “skip it whenever you like”. It means ask better questions.
A practical decision framework
Consider skipping a full wash, or choosing steam and pressing instead, when these conditions apply:
- Dry-clean-only fabric intended for garments that won't be machine washed
- Structured fabrics where water may alter body or finish in ways you don't want
- Decorative projects that won't be laundered routinely
- Quilting or texture-led projects where post-sewing crinkle is part of the look
- Stable fabrics with low risk and low-wash use where a full prewash adds effort without much gain
On the other hand, I would be very reluctant to skip pre washing for:
- Cottons and linens used in garments
- Viscose and similar fibres where behaviour often changes after contact with water
- Dark denims or saturated prints
- Deadstock with uncertain fibre content or finish
- Any fitted garment where even modest shrinkage affects comfort and shape
The right question isn't “Do I always have to pre-wash?” It's “What's the risk if I don't?”
What works best in practice
If you're unsure, use the least aggressive method that still gives you useful information. A swatch test, gentle wash, or careful steam prep can tell you a great deal. That's often enough to make a sensible call without overhandling the fabric.
The sewists who get the most reliable results usually aren't the ones following rigid rules. They're the ones matching fabric prep to fibre, project, and future care.
If you're choosing fabric for your next dressmaking project, More Sewing is a good place to start. Their range includes cottons, viscose and Tencel blends, jerseys, denim, and deadstock, along with the haberdashery that makes prep easier. If you're torn between options, sample swatches and practical customer support make it much easier to decide what to pre-wash, what to test first, and what will work best for the garment you have in mind.