Guides
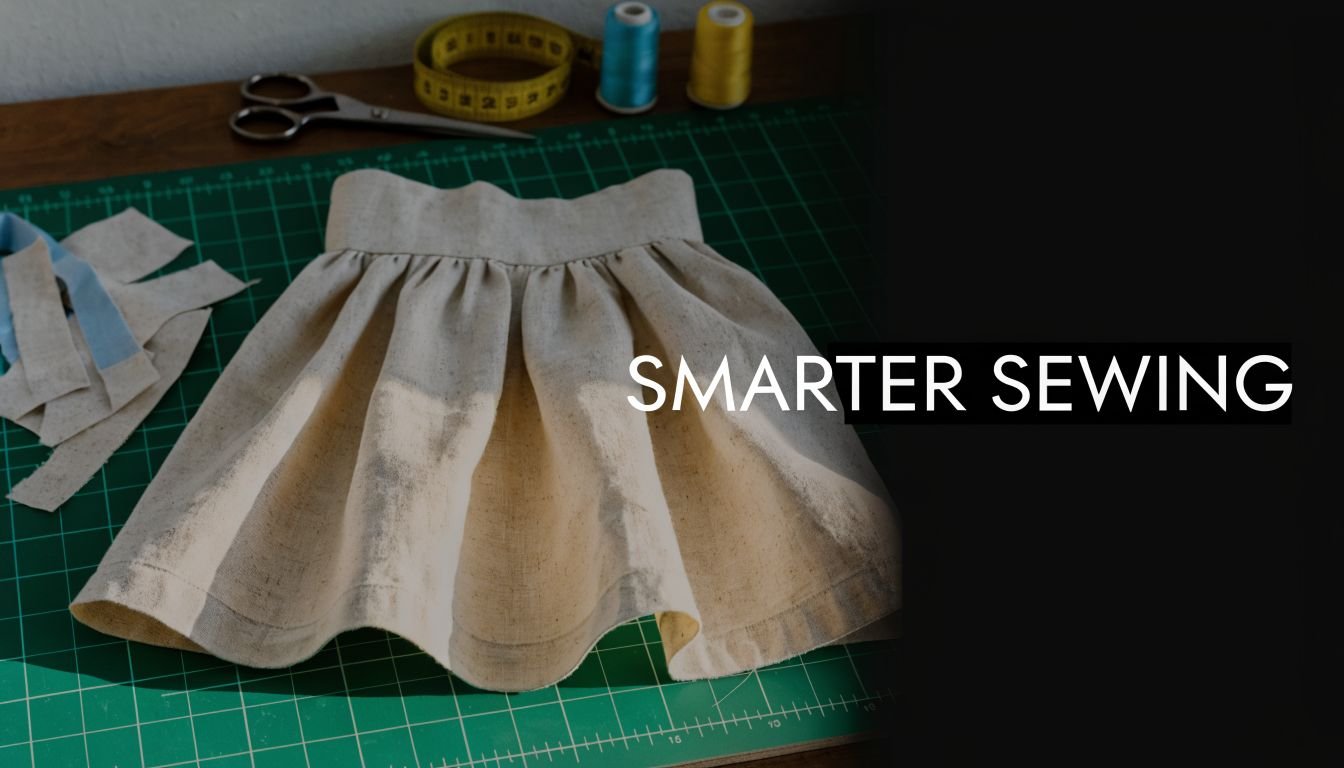
Zero Waste Pattern: A Practical Sewing Guide
You know the moment. The garment is finished, the pressing is done, and you're quite pleased with yourself. Then you look left and find a heap of odd triangles, curved slivers, and one stubborn strip too small for anything useful but too nice to throw away.
That scrap pile is often treated as the cost of sewing. It doesn't have to be. A zero waste pattern changes the job from “cut the garment out of the cloth” to “design the garment with the cloth”.
For home dressmakers, that shift is especially useful. We buy precious lengths, we work with remnants, and we fall in love with deadstock that comes in awkward cuts. A method that helps you use the whole piece is not just a sustainability idea. It's a very practical sewing skill.
Embracing Zero Waste Patterns for Smarter Sewing
A zero waste pattern is exactly what it sounds like. You plan the garment so the full piece of fabric is used, rather than leaving a trail of offcuts behind. That might mean a pocket grows from a corner, a tie comes from a narrow strip, or the shape of a sleeve changes because the fabric rectangle asks for it.
Why this matters at the cutting table
This isn't only about feeling virtuous. It's about making better use of fabric you've paid for and chosen carefully. In the UK, garment manufacturing generates approximately 200,000 tonnes of textile waste annually, and traditional cutting methods discard 15 to 25% of fabric, while academic studies on zero-waste patterns have demonstrated fabric utilisation rates of over 98%, according to design efficiency research on zero-waste patterns.
At home, the same principle lands in a much more immediate way. If you've bought a beautiful washed linen, a crisp cotton poplin, or a length of deadstock Tencel, every unusable offcut feels like money and material slipping away.
Practical rule: Start thinking of fabric as a fixed space first, and a garment second.
That sounds restrictive, but it usually opens things up. A traditional pattern tells you where the garment pieces are. A zero waste pattern asks what else the cloth can become. That's where the interest lies.
Better sewing often starts with less waste
I find home sewists often relax once they stop chasing a perfect paper-pattern mindset. Zero waste work can be more forgiving in spirit because you're designing with what you have, not against it. The result may be cleaner and more considered, especially if you like simple shapes, useful details, and garments that feel a bit individual.
It also fits nicely with broader wardrobe habits. If you're trying to buy less, sew better, and make pieces you'll wear, these tips for mindful clothing consumption are worth a read alongside your sewing practice.
A good zero waste garment doesn't look like a compromise. It looks intentional. The cleverness sits in the layout, not in a loud “eco” aesthetic.
- For beginners: It teaches accuracy, because every line matters.
- For students: It sharpens design thinking, because shape and construction become linked.
- For careful fabric buyers: It makes awkward cuts and remnants far more usable.
The nicest part is this. Once you start seeing a scrap pile as a design problem rather than an unavoidable mess, ordinary sewing becomes more inventive.
Thinking in Shapes Not Scraps
The main mental shift is simple. Stop picturing pattern pieces floating on top of fabric. Start with the fabric itself, usually a rectangle, and divide it deliberately.
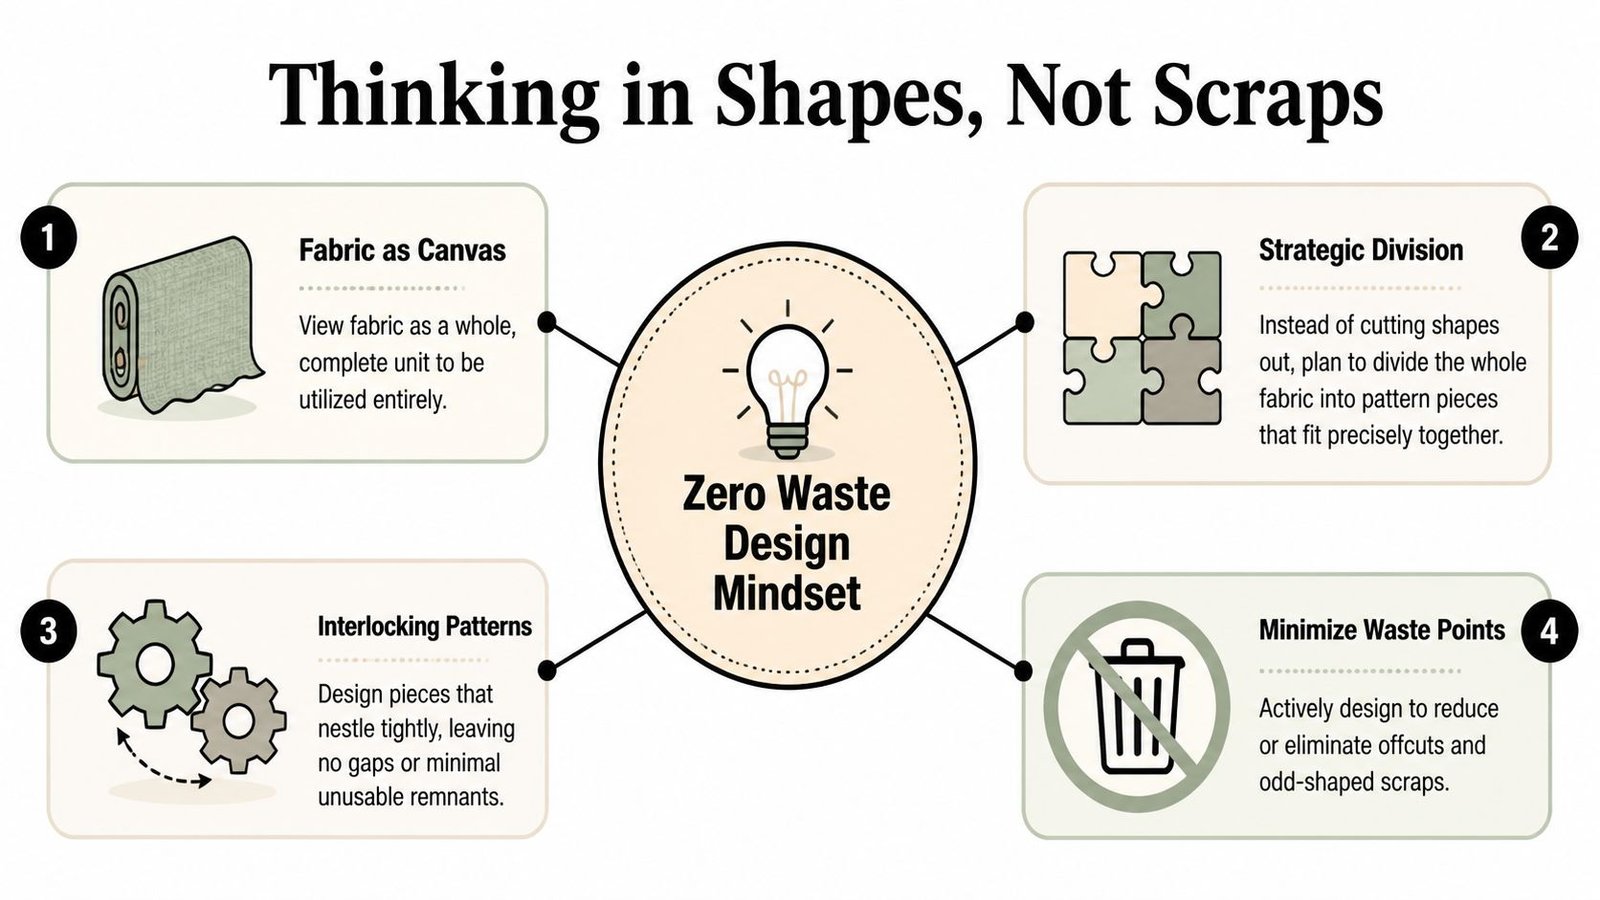
Fabric is the boundary
With conventional dressmaking, we often ask, “Can I fit these pieces on?” With a zero waste pattern, the more useful question is, “How should this whole length be divided?” That changes everything from your first pencil mark.
Think of the cloth as a small floor plan. The bodice, sleeve, collar, ties, facings, and pockets all need a place inside that plan. If one section leaves an awkward gap, that gap isn't waste yet. It might become a gusset, a hem band, a neck binding, or a casing.
A rectangle of fabric is surprisingly generous when you treat it as a complete system.
The jigsaw approach
Tessellation sounds technical, but at the sewing table it's just this: pieces need to sit together neatly, like a jigsaw. Curves tend to create trouble. Straight edges, mirrored shapes, and repeated widths usually behave better.
A few combinations work especially well:
- A square armhole area can become a grown-on sleeve or a dropped shoulder top.
- Long narrow strips are ideal for waist ties, rouleau loops, facings, or bindings.
- Corner sections often become patch pockets, simple cuffs, or pocket bags.
- Negative spaces beside a body block can be turned into underarm gussets.
When a shape looks inconvenient, don't discard it mentally. Turn it ninety degrees and ask what job it could do.
That habit is where most of the progress happens.
What usually works and what doesn't
The most successful beginner layouts are blunt, geometric, and calm. Boxy tops, elastic-waist trousers, simple skirts, pull-on dresses, and wrap styles all respond well to zero waste planning. They don't fight the cloth.
What tends to go wrong is trying to force a highly sculpted garment into a rigid rectangle too early. If you insist on a fitted princess-seamed bodice, narrow sleeve head, and sharply curved neckline on your first attempt, you'll probably create stress for yourself and lose the elegance that makes this method work.
A useful way to compare approaches is this:
| Approach | Usually works well | Often causes trouble |
|---|---|---|
| Shape choice | Rectangles, squares, repeated widths | Many isolated curves |
| Silhouette | Loose, layered, wrapped, gathered | Very close-fitted tailoring |
| Construction | Shared seams, continuous cut lines | Separate tiny pieces |
| Mindset | Adapt the design to the cloth | Force the cloth to obey a sketch |
If you're used to commercial patterns, this can feel back to front at first. Give it a project or two. Soon enough, scraps stop looking like leftovers and start looking like options.
Drafting Your First Zero Waste Top
For a first project, keep it simple. A relaxed top with a straight body, easy neck opening, and either cap sleeves or cut-on sleeves is ideal. Stable woven fabric behaves best here because it stays where you put it and lets you mark cleanly.
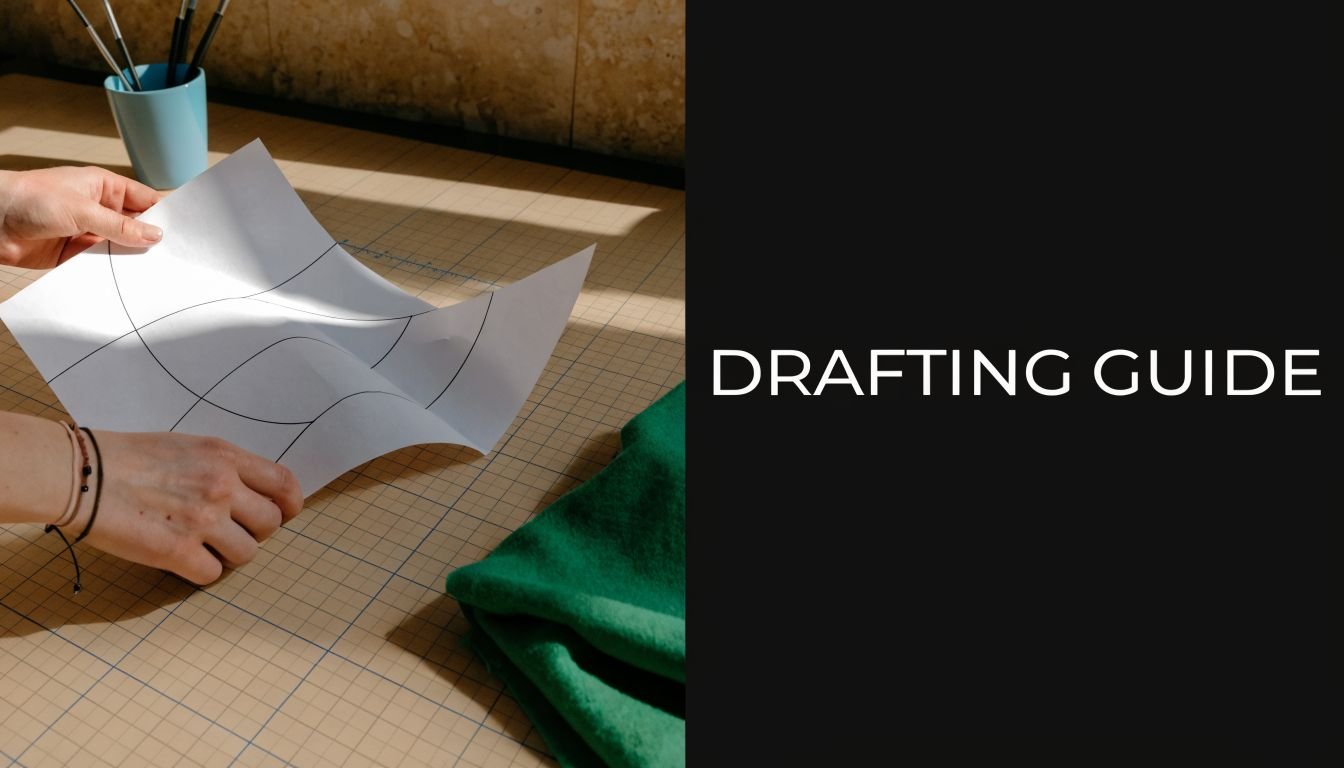
Start with the cloth and your body
Take the key measurements you need. For this style, that's your bust, your preferred finished top length, and a rough idea of sleeve depth. You don't need a full set of tailoring measurements to make a useful first zero waste pattern.
Lay out your fabric flat and square the cut ends so they're true to the selvedge. Then decide which dimension will become the body length and which will become the width around the body. That decision shapes the whole garment.
Using a pencil-and-paper flat pattern method, you can achieve nearly 100% fabric utilisation. A key step involves dividing your fabric length, for example 206 cm into major sections such as 103 cm for front and back, then plotting your pattern blocks and integrating seam allowances into shared cut lines, as shown in Liz Haywood’s zero-waste flat pattern method.
Map the top as one system
For a very straightforward top, I like to think in three areas: body, neck, and what the side spaces can become. Draw the front and back as two large connected blocks first. Then carve out the neck opening from a central area small enough to finish neatly but large enough to get over the head.
The sections left on either side of the upper body can become small sleeves, shoulder extensions, facings, or pocket pieces depending on your width and desired shape. If you're using a generous width, you may get a better result by keeping the body broad and adding underarm shaping later with ties or a tuck, rather than trying to engineer a fitted armhole from the start.
Workshop note: Build the main body first. Let sleeves and extras emerge from what's left, not the other way round.
That order keeps the garment wearable even if the “bonus” pieces change during drafting.
A beginner-friendly layout idea
Try a top with these characteristics rather than chasing an exact commercial pattern look:
- Straight front and back panels cut from the main rectangle
- Dropped shoulder line instead of a set-in sleeve
- Shallow side shaping created with ties or a soft tuck
- Neck facing or binding cut from the interior opening or corner pieces
- Patch pocket from one remaining corner if the layout allows
This gives you plenty of room to test the method without making the sewing difficult.
Add seam allowances with care
One of the smartest parts of zero waste drafting is that seam allowances can be built into shared lines. Instead of adding extra all around every isolated piece, you plan a cut line that serves two adjacent sections. That's tidy on paper and economical in cloth.
Mark those allowances clearly and consistently. If your side seam allowance differs from your neck finish allowance, label it. Don't rely on memory once the chalk lines multiply.
A few habits help here:
- Use two colours of chalk or pencil if your fabric allows it. One for cutting lines, one for folding or stitching references.
- Label each zone directly on the fabric. “Front”, “back”, “binding”, and “pocket” save confusion later.
- Check the neck opening before cutting fully. Fold the fabric at the shoulder line and test the space visually.
Sew the top with flexibility
Assemble the shoulder seams first, then test the neck opening before finishing it. Sew side seams after trying the top on, because that gives you a chance to refine the silhouette without undoing much work. If the body feels too square, use a tie channel, a stitched tuck, or a small inserted panel from an available strip.
The first version doesn't need to be the final word. What you gain is a working method. Once you see how one top comes together from a rectangle, you start spotting variations immediately. A longer length becomes a tunic. A wider leftover strip becomes a belt. A deeper side area becomes a sleeve extension.
That's when zero waste drafting starts to feel natural rather than theoretical.
Mastering the Art of Fabric Layout and Cutting
Drafting is one part of the job. Cutting cleanly is what makes the whole thing believable.
Draw on fabric or make a template
For stable fabrics, drawing directly onto cloth is often the quickest route. Tailor's chalk, a washable pen, or a soft pencil on the wrong side can all work. Direct marking is especially handy with remnants and deadstock because you're responding to the actual shape in front of you, not an idealised rectangle on paper.
Paper templates help when the fabric is slippery, precious, or difficult to trust. If I'm handling a drapey woven that shifts under the hand, I prefer a rough paper plan first. It doesn't need to be a polished printed pattern. Even taped-together parcel paper with grain and fold lines marked clearly will do.
A useful rule is simple. If the fabric moves, stabilise the plan. If the fabric behaves, mark it directly.
Common widths and awkward cuts
Home dressmakers in the UK often run into widths such as 115 cm and 150 cm when planning around deadstock and dressmaking fabrics. Those widths affect proportions more than people expect. A top that feels roomy and elegant on a wider cloth may need a different sleeve idea or side shaping on a narrower one.
For 115 cm widths, work with vertical planning. Let length give you your options. Tunics, simple skirts, children’s pieces, and sleeveless tops are often easier than trying to force broad sleeves into the width.
For 150 cm widths, use the extra room intelligently. It can accommodate wider body sections, cut-on sleeves, or integrated pockets, but it can also tempt you to waste space if you leave wide unused side channels.
If your deadstock is irregular, don't trim it into a neat rectangle too quickly. Keep these possibilities in play:
- Use a finished edge as a hem when the selvedge or remnant edge is attractive and stable.
- Place narrow components in missing-corner areas, such as facings, ties, or pocket welts.
- Match the design to the flaw. A faded edge might become an internal facing rather than a visible panel.
- Work around the shortest point first. Once the limiting area is solved, the rest usually falls into place.
Cutting with less fuss
Zero waste layouts often rely on long shared lines, so accuracy matters. A rotary cutter can be excellent for straight runs on a mat. Fabric shears give better control on internal corners and curves. I use both on most projects.
Cut the longest structural lines first. Leave finer internal details until the main shape is stable and easy to read.
Don't snip notches everywhere out of habit. Too many notches can muddy the edge of a carefully planned layout. Mark key points with chalk, thread tacks, or tiny clips inside the seam allowance instead.
If you're unsure, baste before committing. Zero waste sewing rewards patience at exactly the same moments that ordinary sewing does. It just asks for a bit more forethought at the cutting stage.
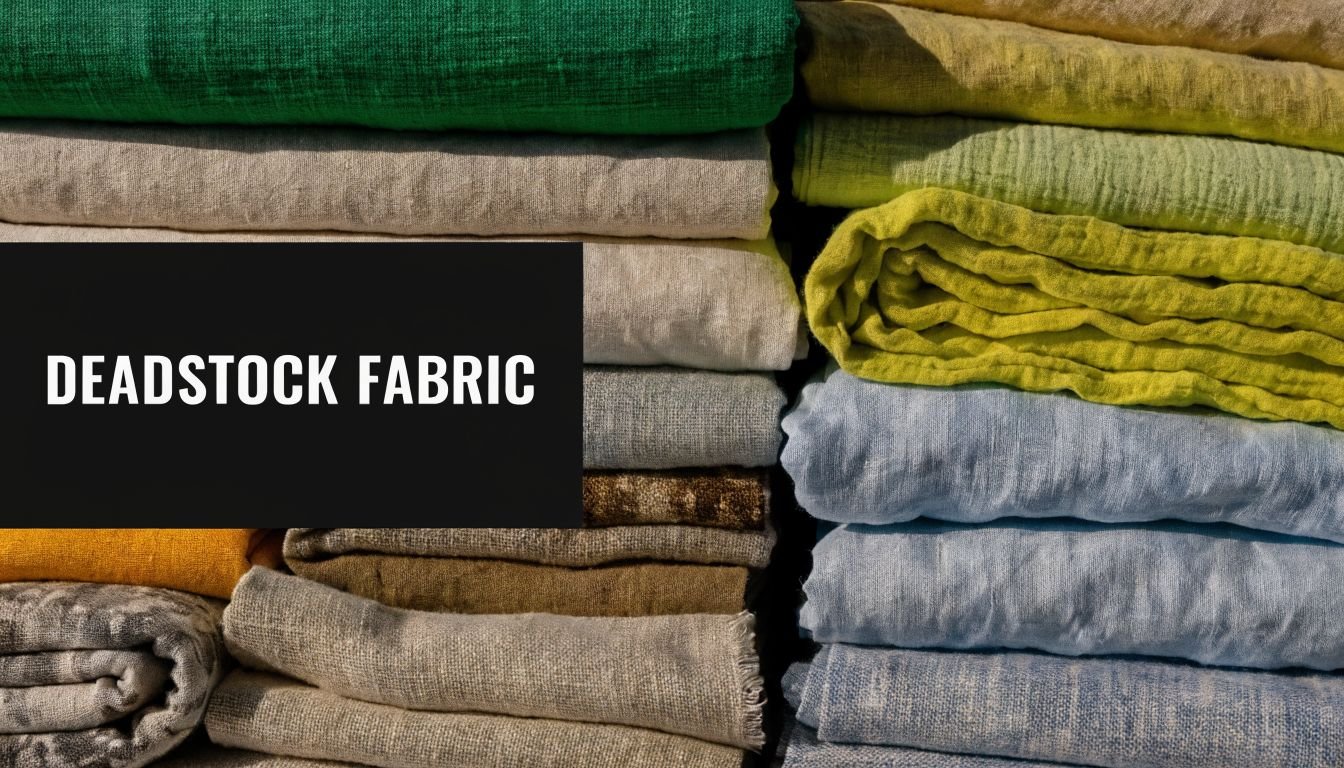
Sourcing Sustainable Fabrics and Deadstock
Fabric choice decides whether your first zero waste pattern feels satisfying or needlessly difficult. The cloth doesn't need to be expensive, but it does need to suit the method.
Best fabrics for a first attempt
If you're learning, choose a stable woven. Cotton poplin, chambray, lightweight denim, linen blends, or a calm viscose-linen mix are all easier to mark, square, and cut than fabrics that slither off the table. They also press well, which helps when a design relies on straight lines and shared edges.
Deadstock Tencel can be lovely for a slightly more fluid top or wrap shape. It drapes beautifully, but it also shows every indecisive chalk line and can shift while you're measuring. If you're using it for a first project, keep the design simple.
For quick reference:
| Fabric type | Why it helps | Watch out for |
|---|---|---|
| Cotton poplin | Crisp, easy to mark, easy to press | Can feel structured if the design wants drape |
| Chambray | Friendly for tops and shirt-like shapes | Check opacity in lighter colours |
| Linen blend | Stable with a soft finish | Creases can confuse layout lines |
| Tencel woven | Beautiful drape for simple silhouettes | Slippery during marking and cutting |
| Light denim | Great for practical shapes and pockets | Bulk at enclosed seams |
Why deadstock suits zero waste so well
Deadstock and zero waste belong together. If the fabric already exists and comes in a one-off cut, it makes sense to design around its exact dimensions instead of forcing it into a standard pattern layout. That can produce garments with more character and less waste.
A 2025 UK Sewing Association survey indicated that 62% of home dressmakers struggle with scraps from irregular fabrics like ex-designer deadstock, which points to the need for layouts adapted to non-standard pieces and common UK widths such as 115 cm or 150 cm, as noted in The Fold Line’s discussion of zero-waste sewing patterns.
That rings true at the cutting table. The challenge isn't that deadstock is awkward. The challenge is that many sewing habits assume the cloth is regular when it isn't.
How to handle unknown fabrics sensibly
Deadstock often arrives with limited information. Treat that as part of the process, not a disaster. Before committing to your layout, do a few checks.
- Pre-wash carefully: If you're unsure about shrinkage or finish, wash a test swatch first or use a gentle approach for the whole piece.
- Press before measuring: Creases distort the plan.
- Check drape in the hand: A geometric layout on paper may hang very differently in a soft cloth.
- Test marking tools: Some coatings and finishes reject chalk or hold pen marks.
If you're interested in the broader material side of dressmaking, these sustainable fashion insights offer a helpful overview of why fibre choice matters.
Choose the fabric for the shape you want to wear, not for the purity of the zero waste idea. A garment you love and use is the better outcome.
That's especially true with deadstock. You are often working with what is available once, not what can be reordered later. Respect the cloth, but don't be frightened of it.
Troubleshooting Fit and Using Every Last Thread
A zero waste pattern can still misbehave. The top may feel boxier than expected, the neckline may sit oddly, or a stretch fabric may ripple where you hoped it would skim. That doesn't mean the method failed. It usually means the adjustment needs to happen in a different place from where you're used to making it.
Fix fit without undoing the whole idea
If a woven top feels too wide, don't rush to cut the side seams deeper. First ask whether the fullness can be controlled rather than removed. A waist tie, back casing, stitched tuck, or small pleat can bring shape in without creating new waste.
If the shoulder feels too broad, a narrow fold stitched into the shoulder line can tame it. If the armhole feels restrictive, a gusset from an available internal piece often solves the problem more gracefully than hacking away at the opening.
For quick troubleshooting, try these in order:
- Too boxy: Add ties, a casing, or a tuck before altering seam depth.
- Neckline too open: Finish with a binding that gently draws the opening in.
- Neckline too tight: Convert a closed neckline into a slit or keyhole if the layout allows.
- Hem feels awkward: Rebalance the side seam and hem shape with pressing before recutting anything.
Stretch fabrics need extra care
Knits are where many home sewists get caught out. Adapting zero-waste principles to stretch fabrics like jersey can be challenging, and home sewists report failure rates as high as 35% without size-specific blocks. Key troubleshooting includes accounting for stretch recovery and using appropriate seam finishes to prevent warping, according to guidance on zero-waste fashion design and stretch fabrics.
In practice, that means a few things. Don't assume a woven layout will transfer neatly to jersey. The weight of the knit, its recovery, and the direction of stretch all affect how that rectangle becomes a garment.
If you're using jersey:
- Stabilise shoulders and necklines so they don't grow during sewing.
- Let the fabric rest flat before measuring because rolled edges can mislead you.
- Choose seam finishes that suit stretch, rather than forcing a rigid finish onto a soft knit.
- Test on a small project first, such as a simple shell or tee, before attempting a more ambitious shape.
Small fit corrections are often better than major recuts. Zero waste sewing rewards restraint.
When tiny scraps still appear
Even careful layouts may leave a few threads, corners, or little clipped bits. That's fine. The spirit of the method is using material thoughtfully, not pretending dust-sized remnants don't exist.
Good uses for the very last pieces include:
- Fabric-covered buttons for matching closures
- Cord keepers for irons, chargers, or headphones
- Patchwork needle books from pleasing small shapes
- Pincushion stuffing mixed with other soft snippets
- Tiny binding samples to test finishes before using your main fabric
Keep a small tin or jar by the machine for the best bits. You'll be surprised how often a narrow strip becomes the exact tie loop or hanging loop a later project needs.
If you're ready to try a zero waste pattern with fabric that suits the method, More Sewing is a solid place to start. You can browse dressmaking fabrics, deadstock, and sewing essentials in one place, and if you're local to Worthing, the shop is especially handy when you want to see texture, drape, and colour properly before cutting into your next project.